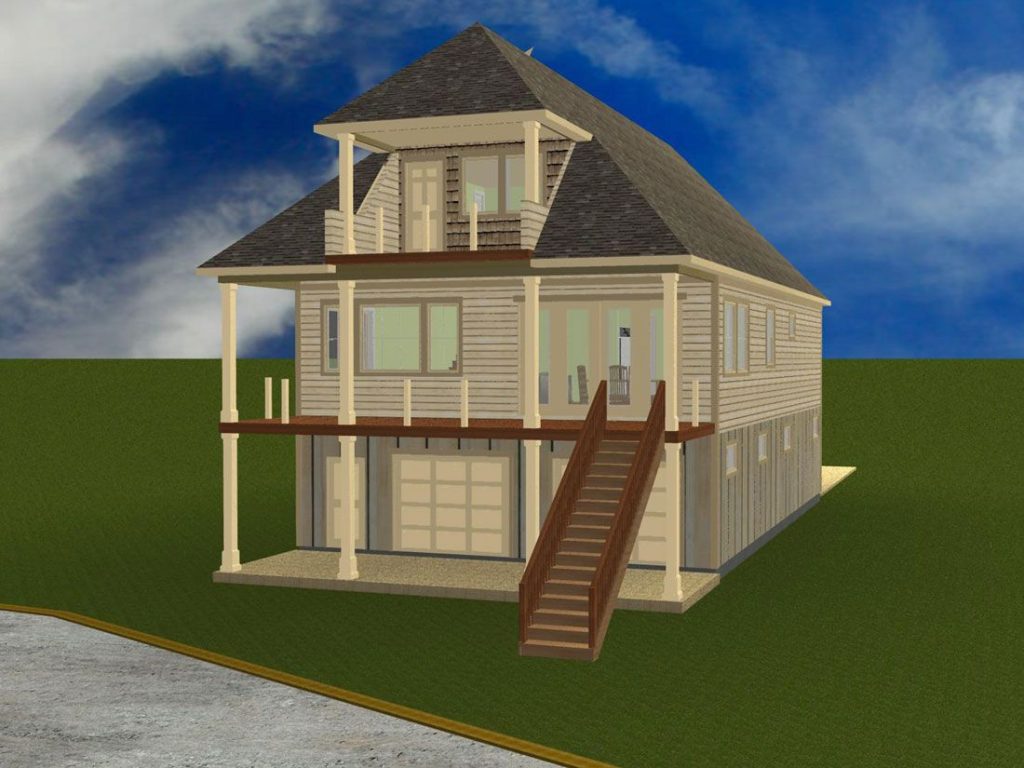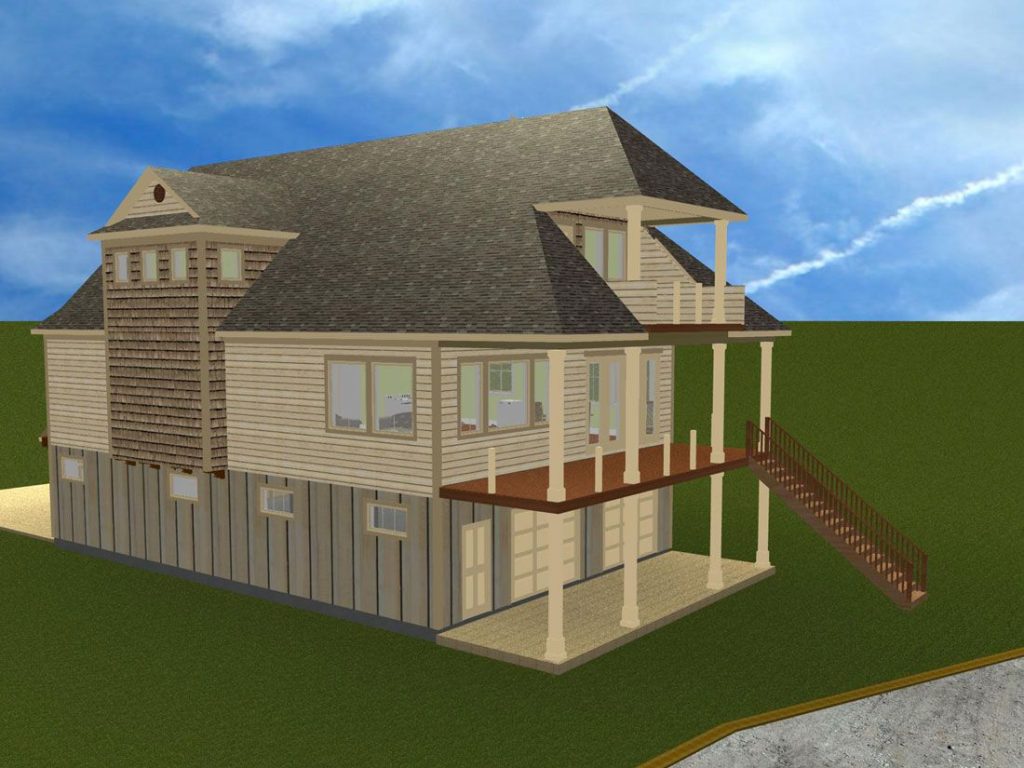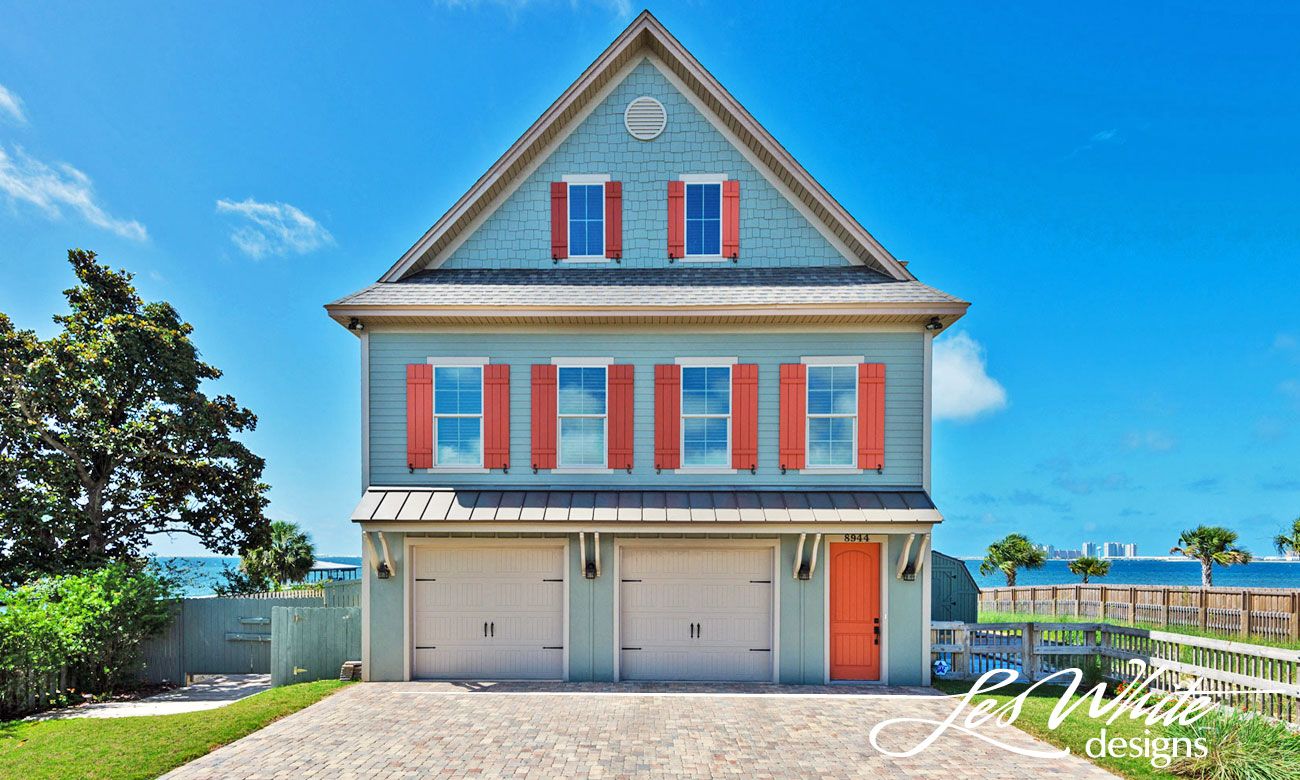
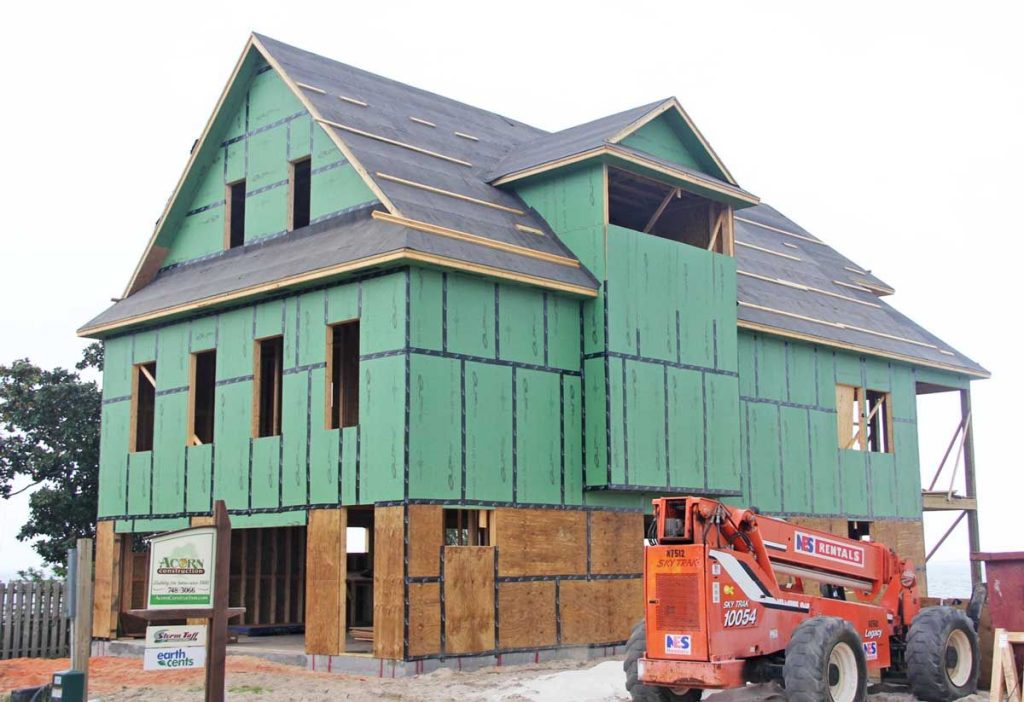
Walker residence
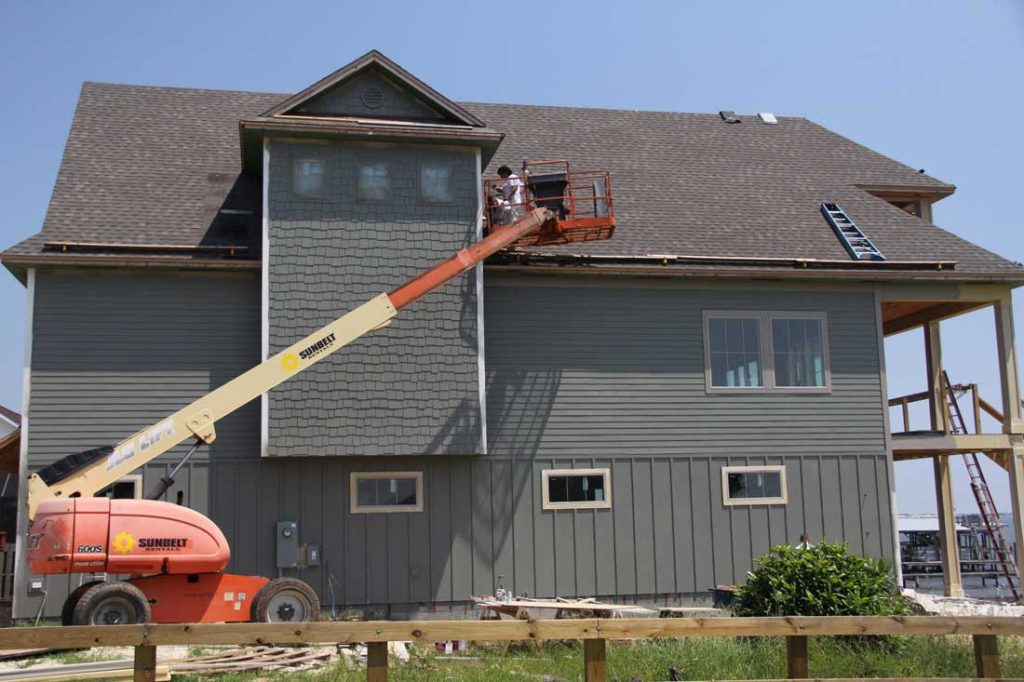
Dr. and Mrs. Walker wanted a home on the sound reminiscent of his childhood home on the Jersey shore, so this is Jersey shore south. Try saying that fast 3 times. Call 748-3066 if you can do it. It features a flood-resistant foundation and a flood-through design which allows flood waters to flow through the ground floor garage without causing damage instead of knocking down our walls. The garage doors facing the water are designed to fail during a storm surge and allow water to flow through the garage and out the front garage doors. There are no pilings in this type of construction and no blowout walls to repair in the event of a storm surge. Just hose out the garage and replace the garage doors.

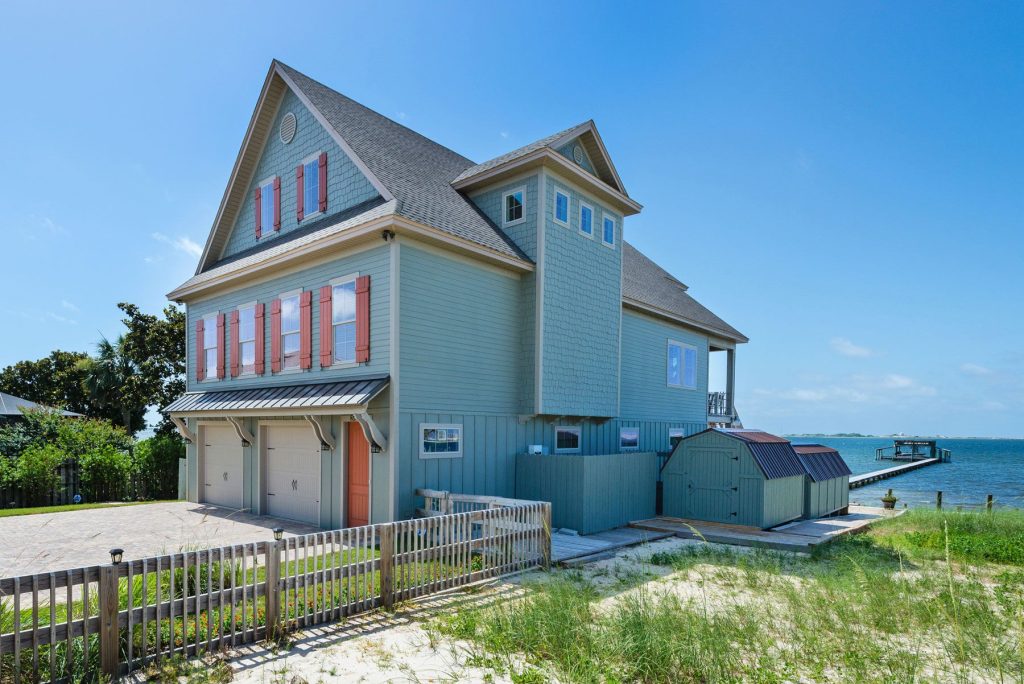
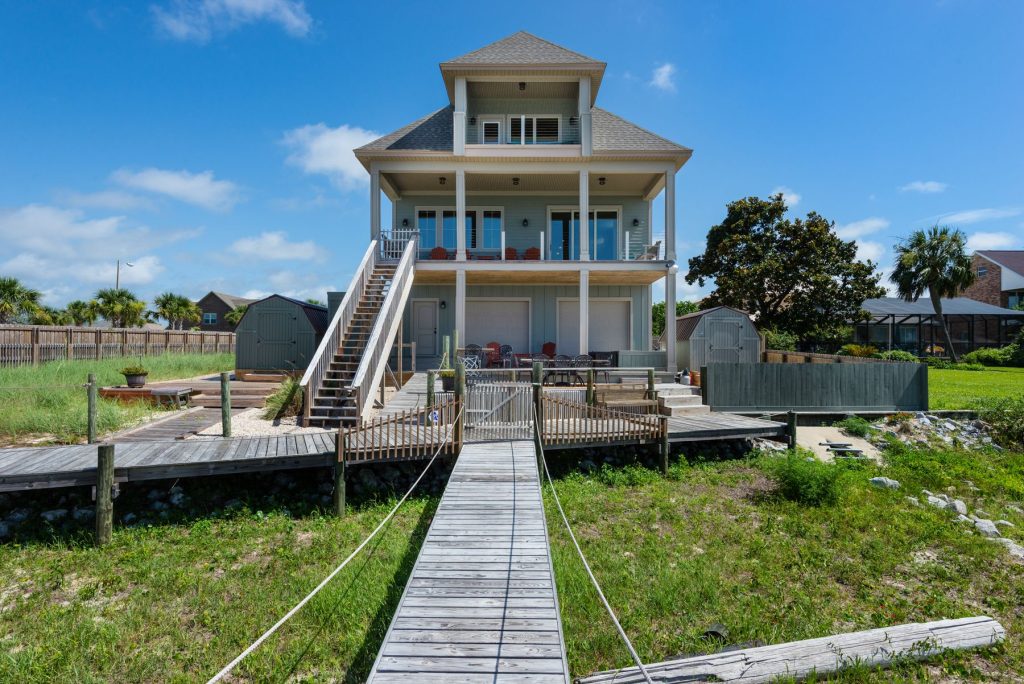
Garage doors on the water side are designed to fail and allow flood-waters to pass through without causing structural damage.
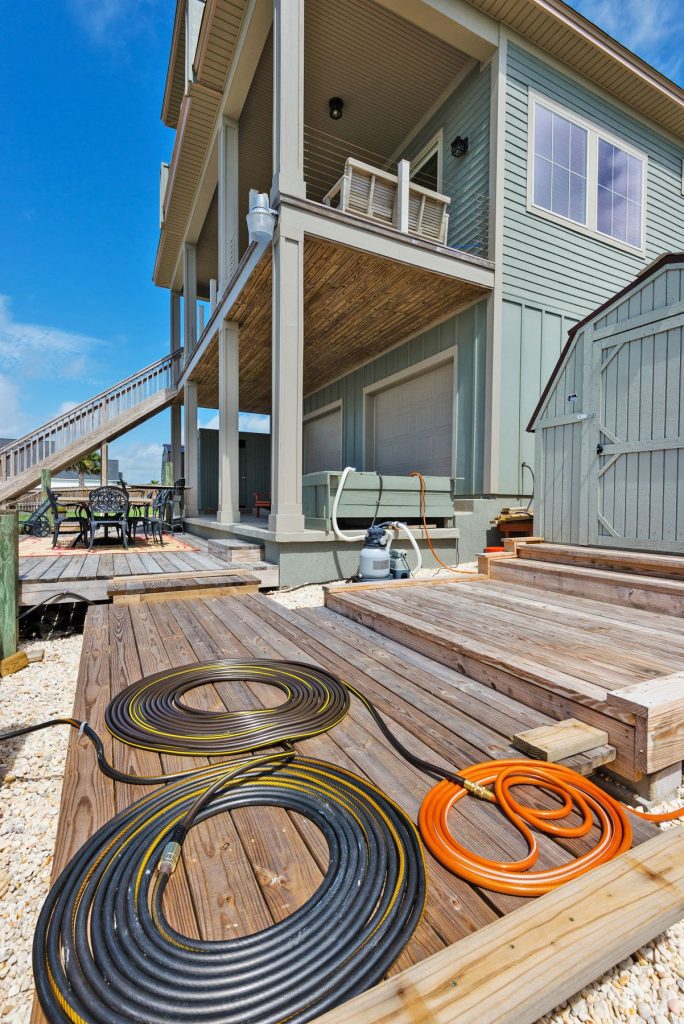
The owner’s hillbilly spa heater. A small submersible pump circulates water from the spa through the hoses laying in the sun to heat water in the spa.
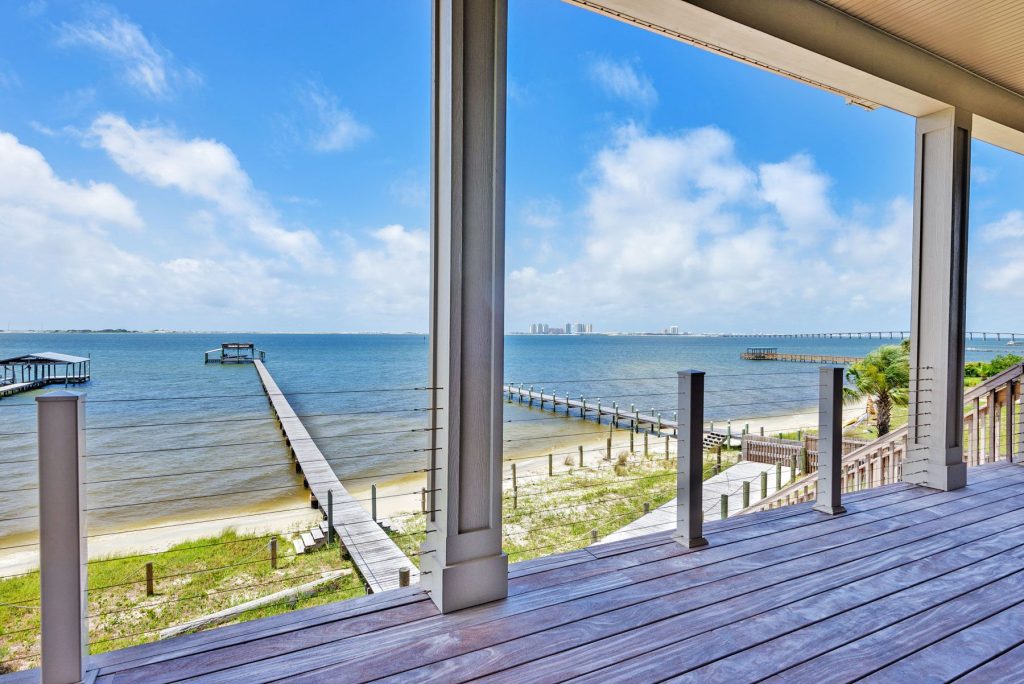
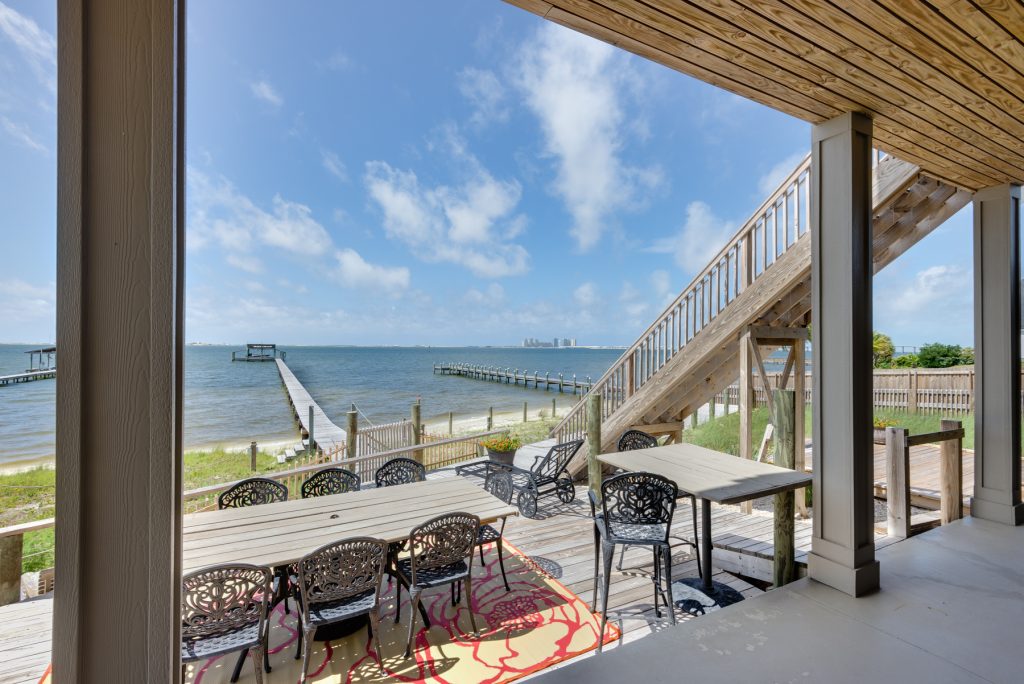
Back porch with Brazilian teak decking and stainless steel wire rope railing.
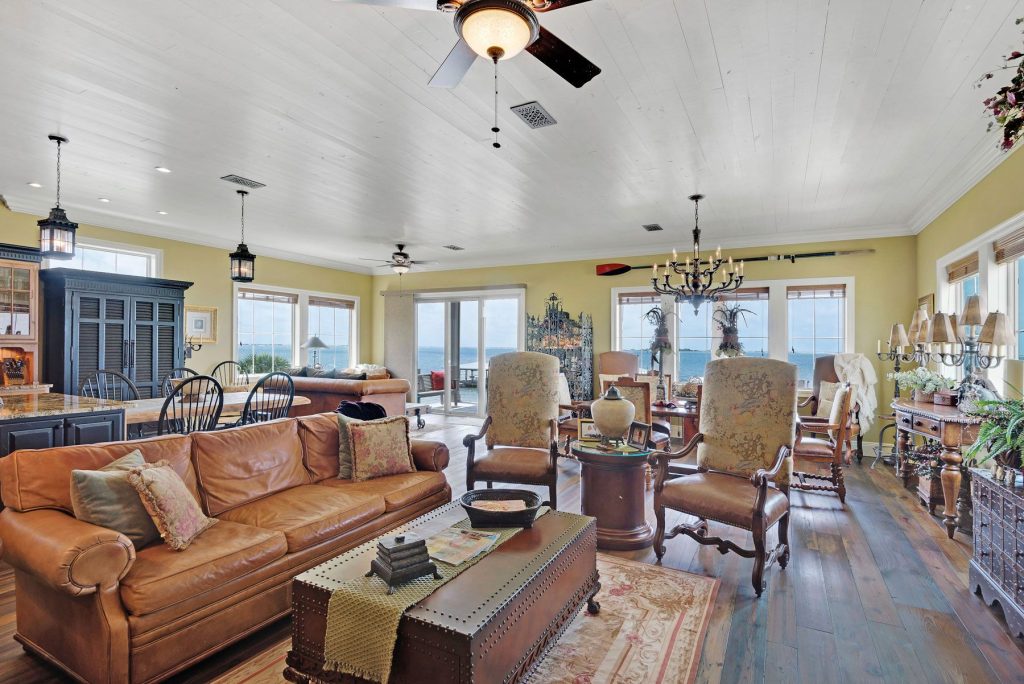
Grand living, dining, and kitchen space. 1×6 painted pine tongue and groove ceiling.
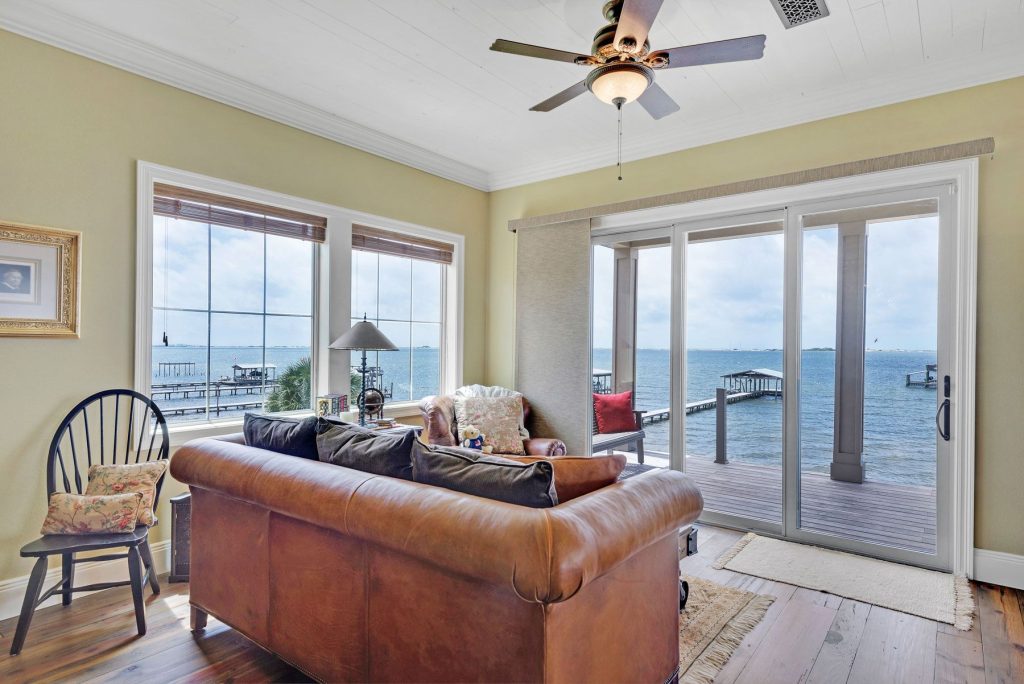
Water view sitting area.
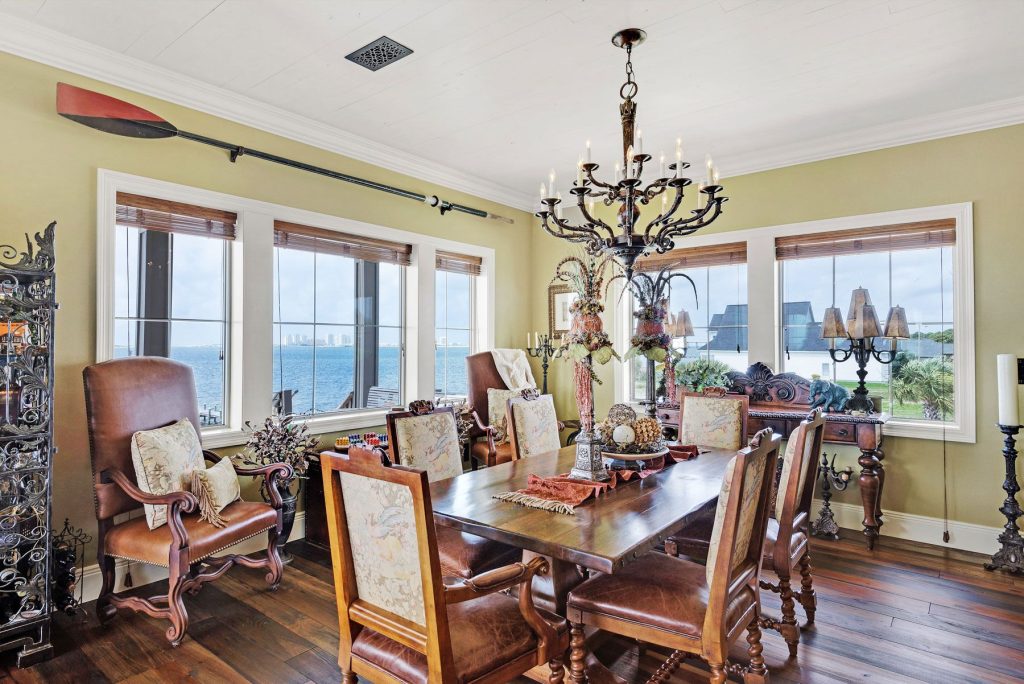
Dining area.
View from master suite into master bath highlighting wide plank reclaimed heart pine floor from Authentic Pine Floors.
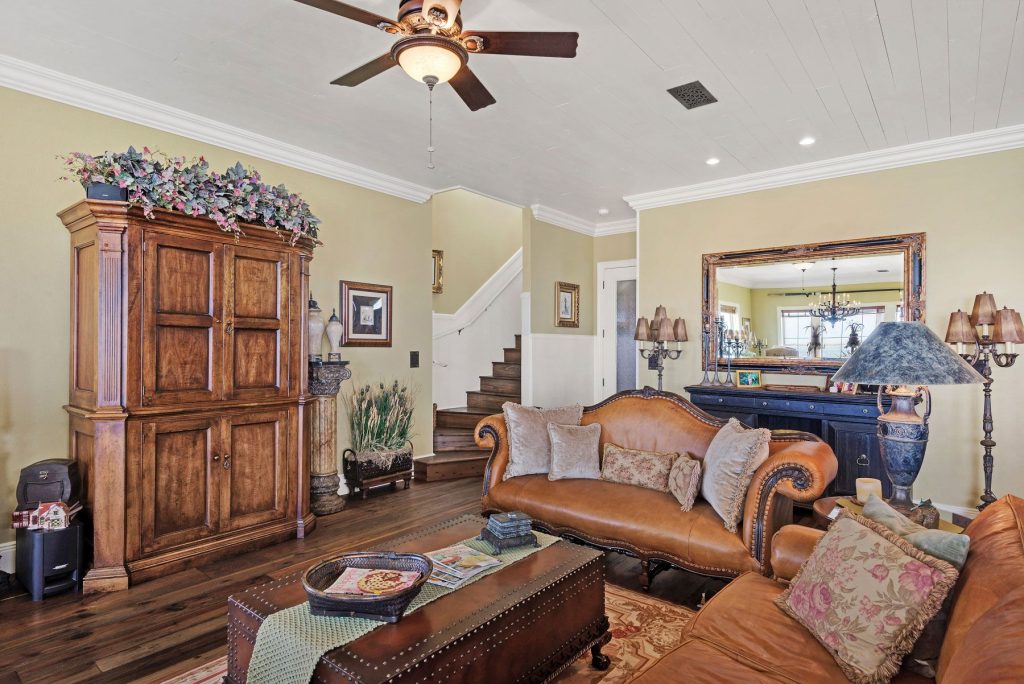
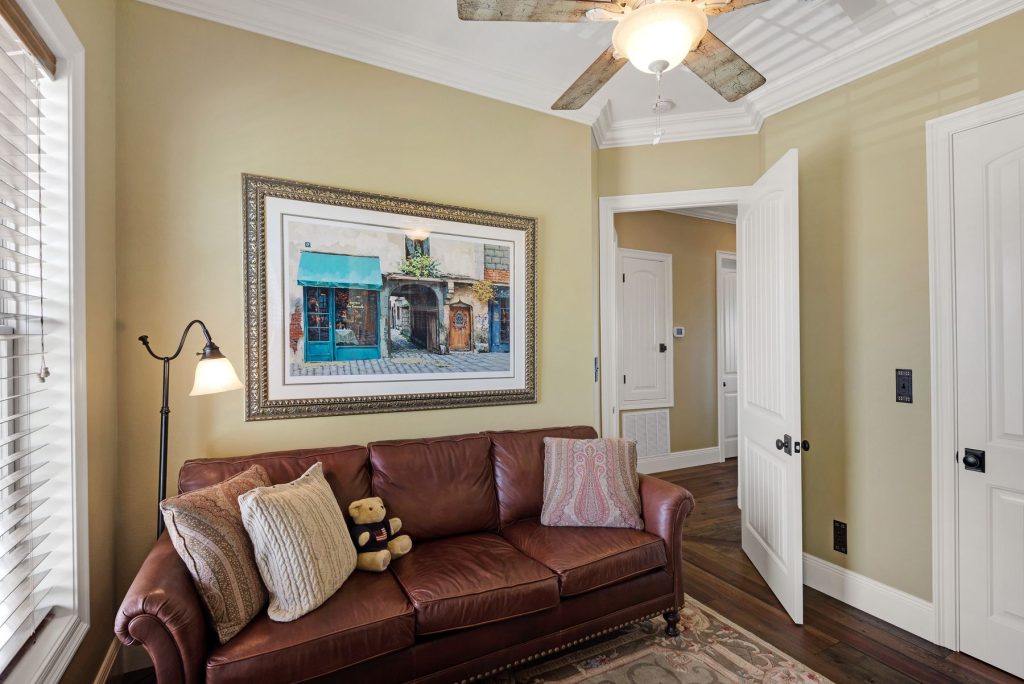
Living room furniture group. Amoire on left conceals TV.
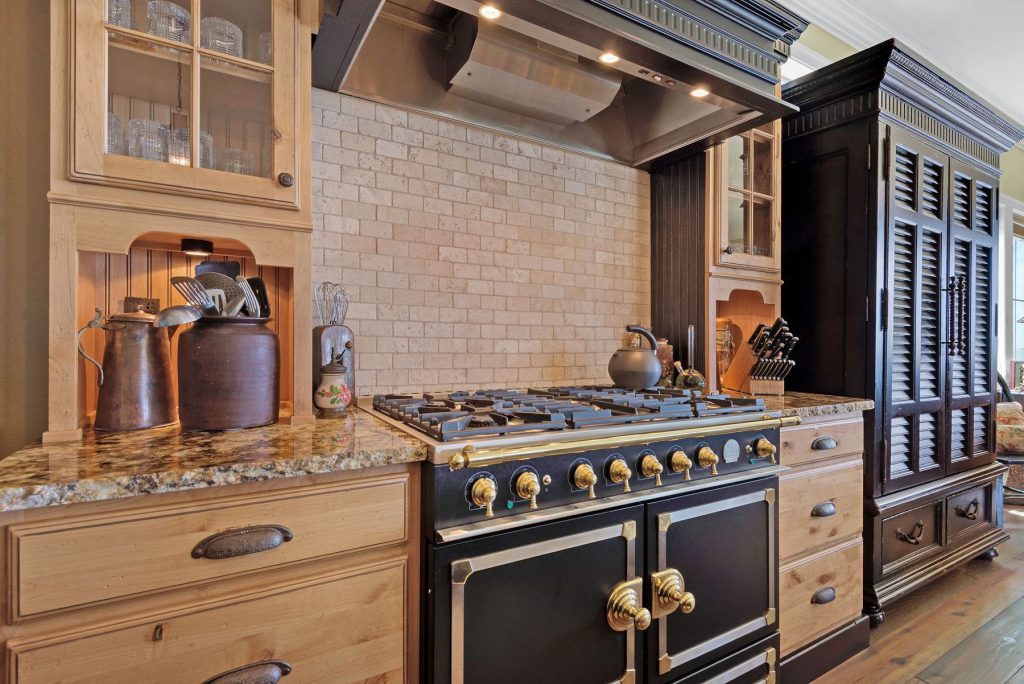
La Cornue gas range.
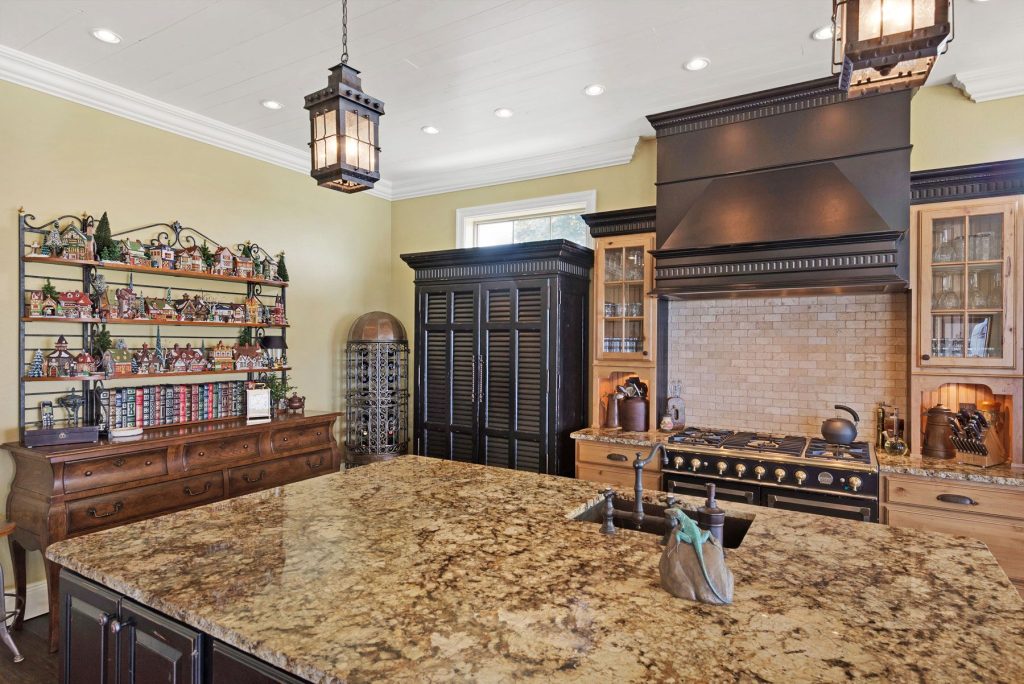
Granite tops by Superior Granite.

Antique industrial adjustable height work bench re-purposed as a breakfast table.
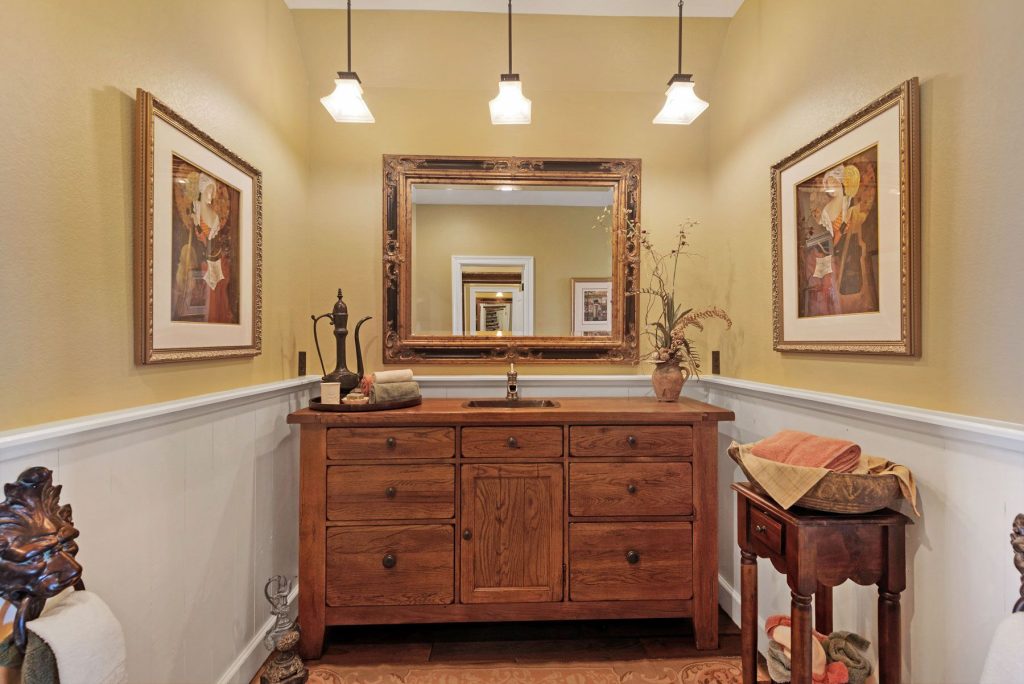
Master vanity with 1×6 tongue and groove wainscoting.
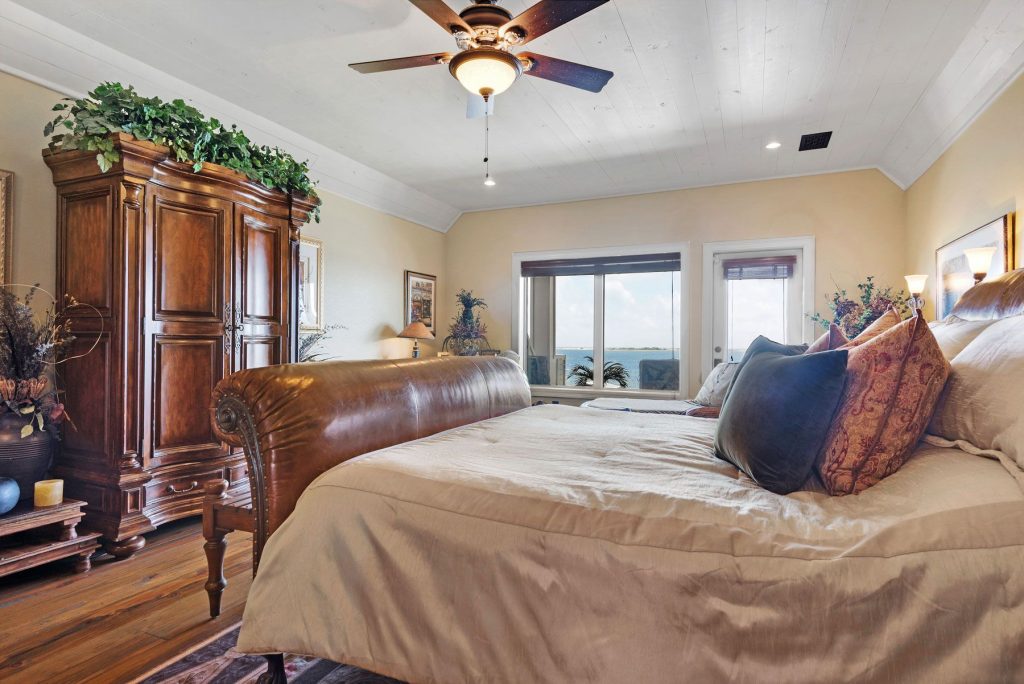
Master suite on 3rd floor.

Antique sewing machine table re-purposed as the powder room lavatory.
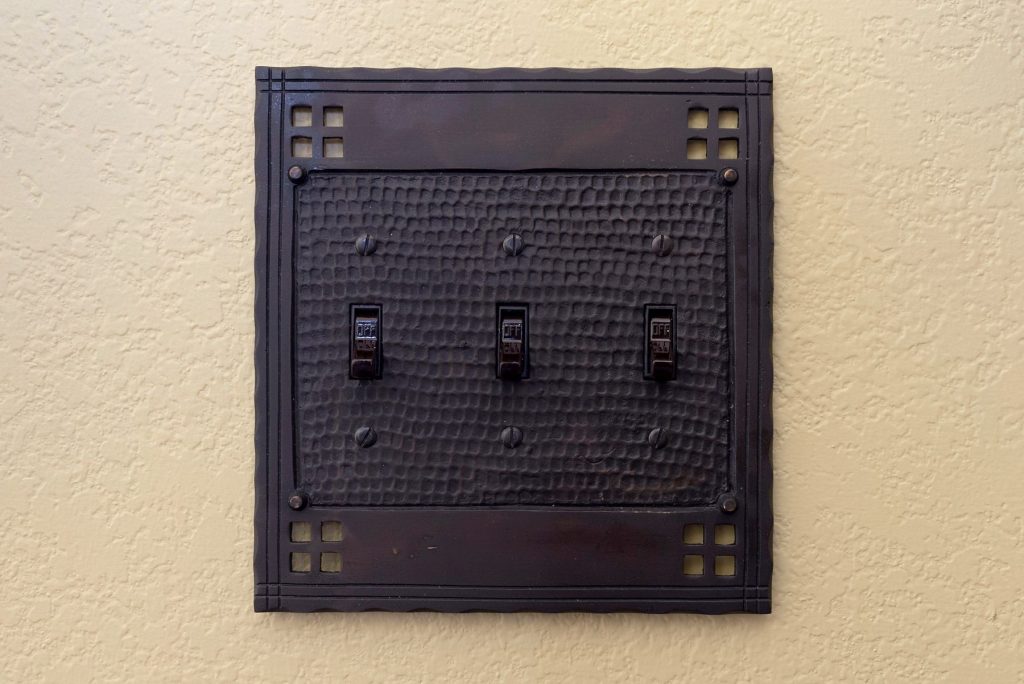
Arts and crafts style switch plate covers.
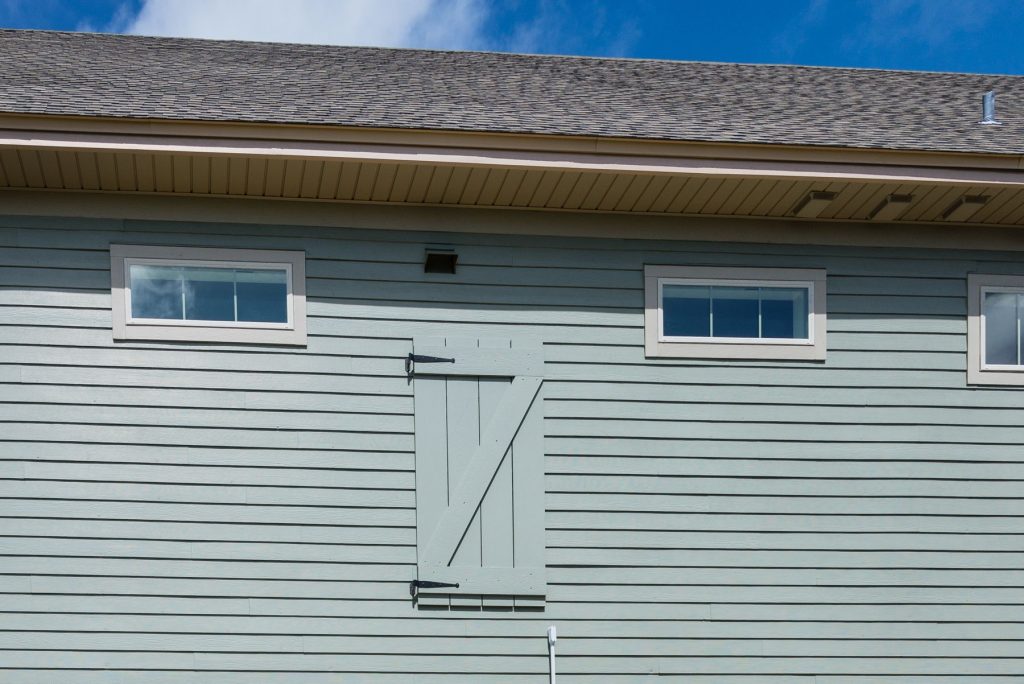
We built a hay loft door detail to break up the long east wall and add a degree of authenticity to the building.
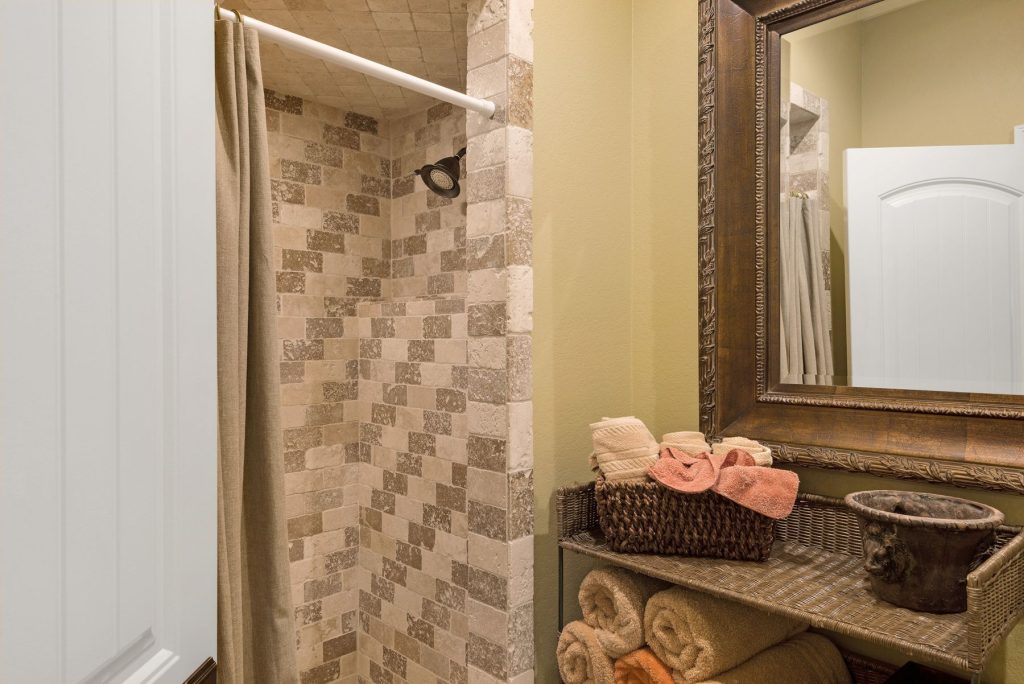
Master shower walls of tumbled stone.
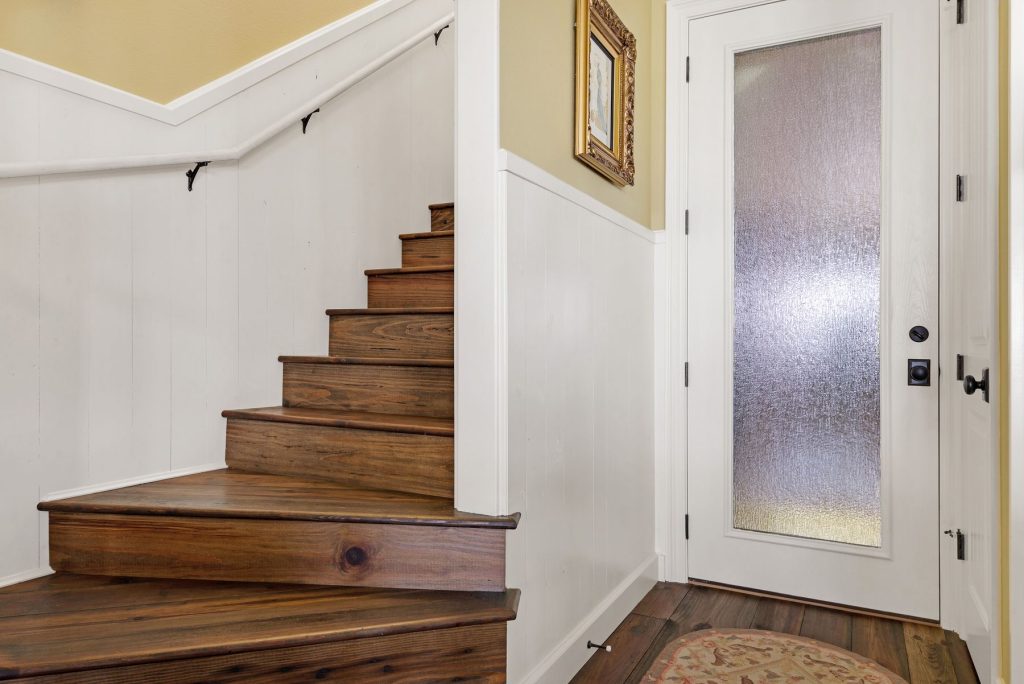
Entry door from garage below and stairs to 3rd floor master suite. Stairs are made from the same reclaimed heart pine material as the floors.
BR3
Ground floor garage with steel support columns at left in the middle of the garage. High horizontal windows allow walls to be used for storage.
Small metal porch run breaks up the front elevation with a nice horizontal detail.
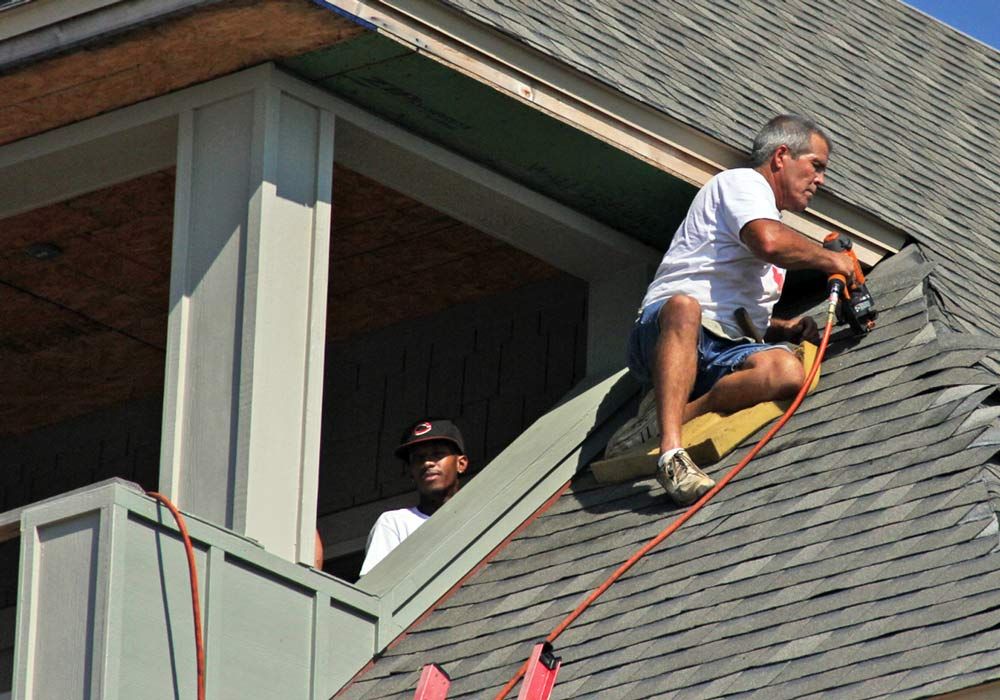
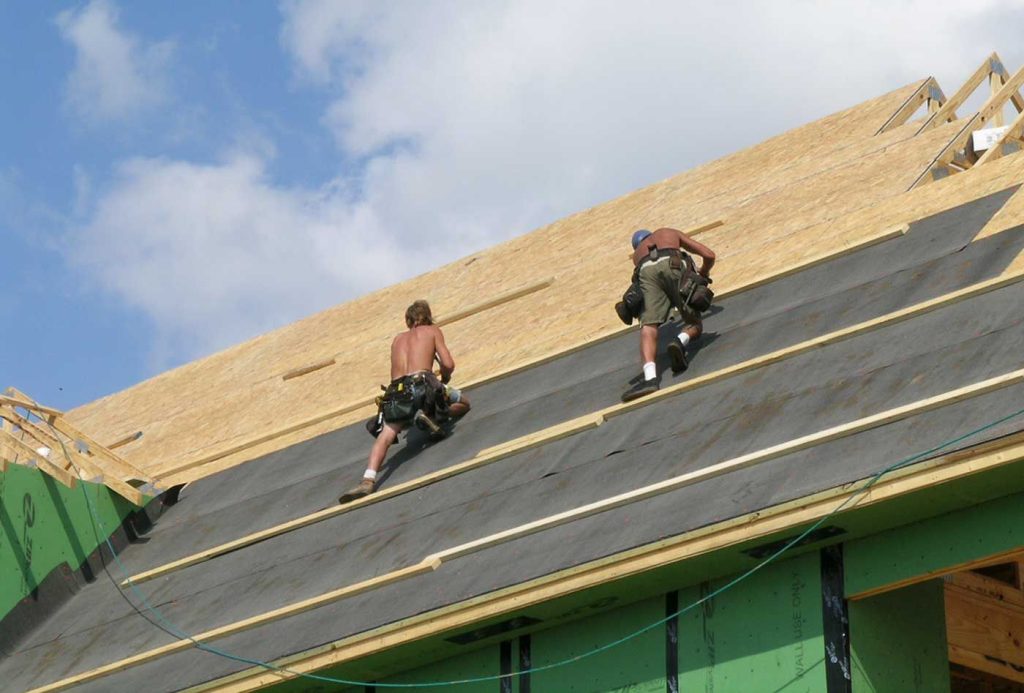
Bradley nails off the shingles on a 12″ pitch hip roof. He’s fastening each shingle with 6 nails. The shingles are installed over a 50 mil peal and seal subroof so that if a shingle gets damaged during a storm the roof will remain water tight.

Jasper conducts an air leakage test using our Retrotec door fan. The fan draws a 50 pascal vacuum on the house which simulates a 20 mph wind on all 4 sides. The Walker residence tested at 1.6 air changes per hour at 50 pascals. A new home is considered to be energy efficient if it tests at 4-7 ACH50, 1.5-4 for a high performance home. At 1.6 we were almost off the chart!
ACH50 is the single most important metric for determining how energy efficient a home is. It’s like MPG for cars. The more air tight a home is the less you have to heat and cool outside air coming into the building. The lower the air changes per hour is the more energy efficient the building is and the lower the operating costs will be. Humidity levels will be lower, temperature more evenly distributed, and overall comfort much improved in an airtight home.
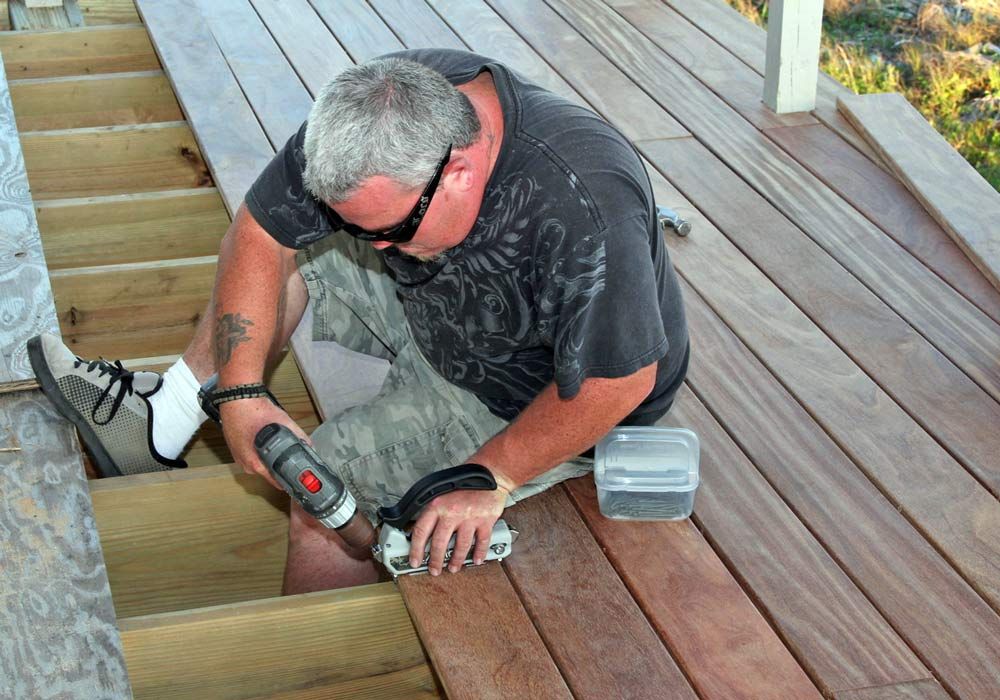
Dougie installs cumeru (Brazillian teak) boards on the back porch. He’s using a screw jig to set the spacing and install special coated screws at at angle so that they don’t show from above. Cumeru is extremely dense, weathers well, and will last 25-50 years.
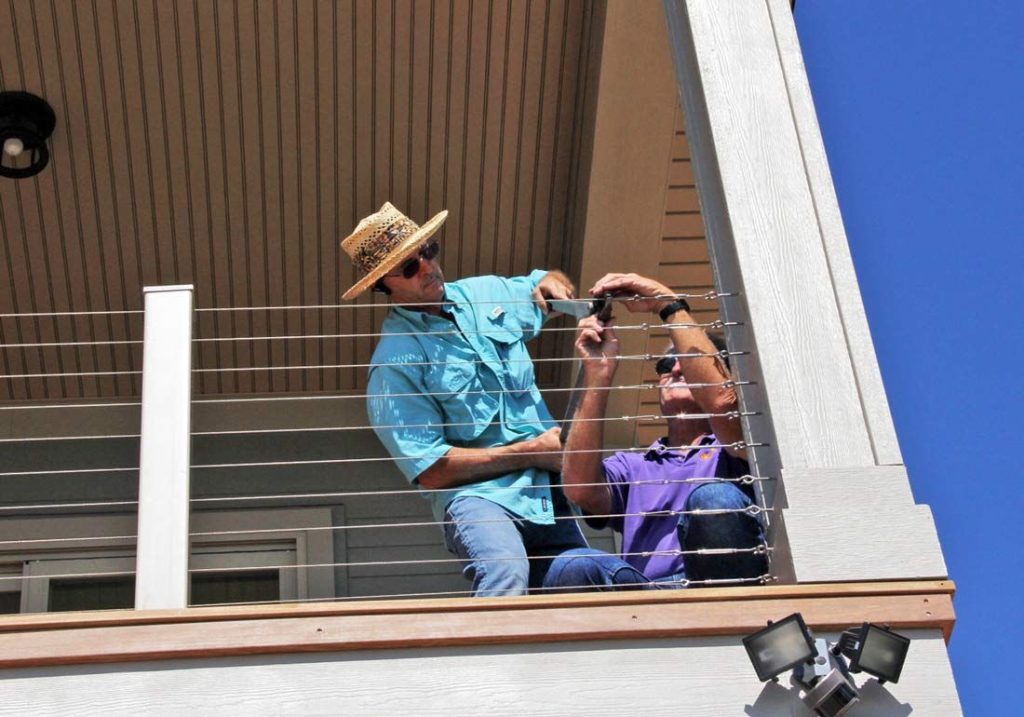
Les and Jasper crimp the turn buckles to the back porch wire rope railing. The stainless steel wire rope railing allows an unobstructed view of the water. When looking out toward the water the viewer’s eye filters out the thin wire railing and focuses on the broad long range views. This is the absolute best way to experience the beauty of this view of Santa Rosa sound.
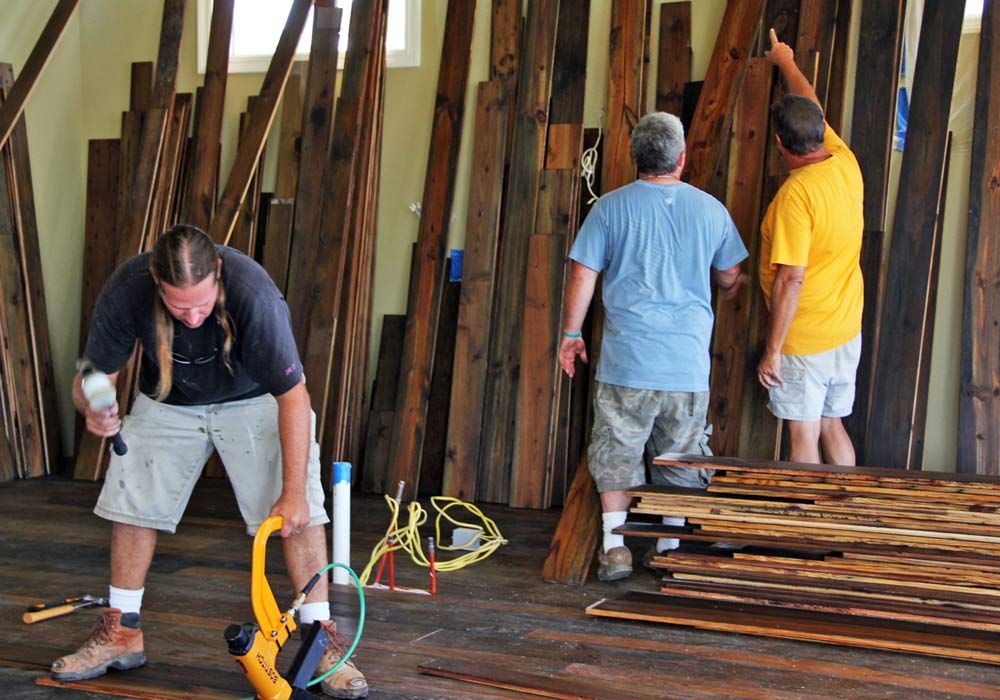
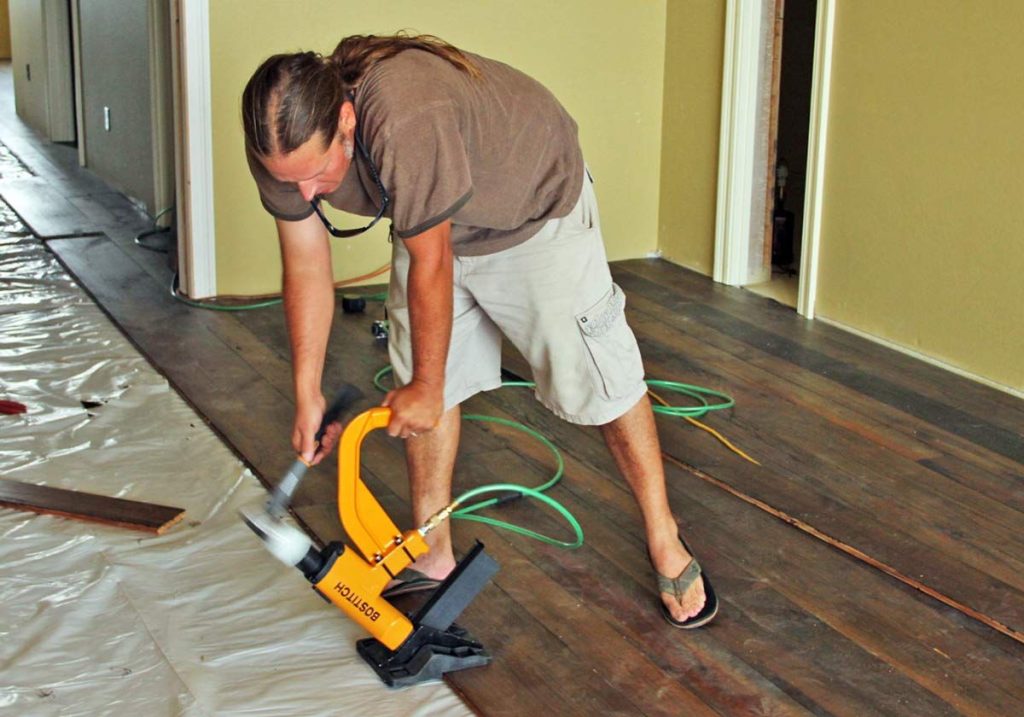
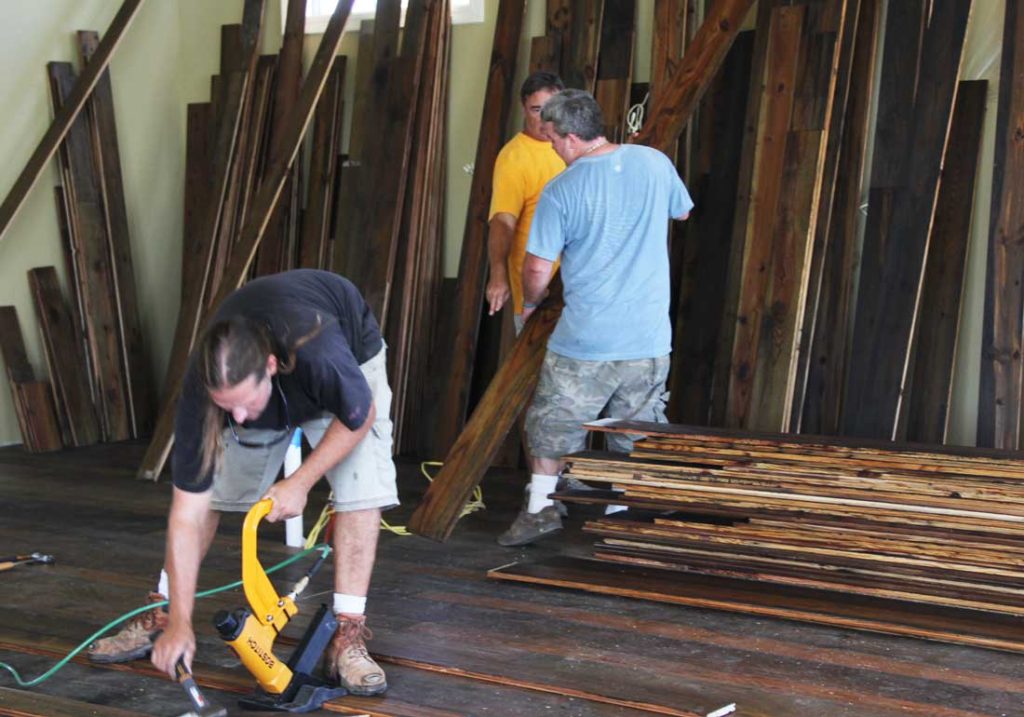
Rob selects the next board for installation as Gerry and Dougie call for various widths and lengths to be installed. There are 6″, 8″, 10″ , and 12″ widths which must be installed in a random pattern. Rob is picking each board to create the best overall presentation of these beautiful reclaimed heart pine floors.

Gerry nails off the tongue and groove ceiling in the master bedroom. Jasper and Dougy assisting. You can see the foam attic insulation in the back ground.
Gerry nails down reclaimed wood flooring in the master suite. These heart pine floors came from an Old Crow distillery. We used 2 interlaced layers of 30# felt and 6 mil poly to form a vapor barrier. These wide planks are particularly sensitive to moisture content changes and will swell and cup if not properly nailed and protected from moisture intrusion from below. The AC’s have been started up to dehumidify the building and acclimate the planks to a lower moisture content before installing them.
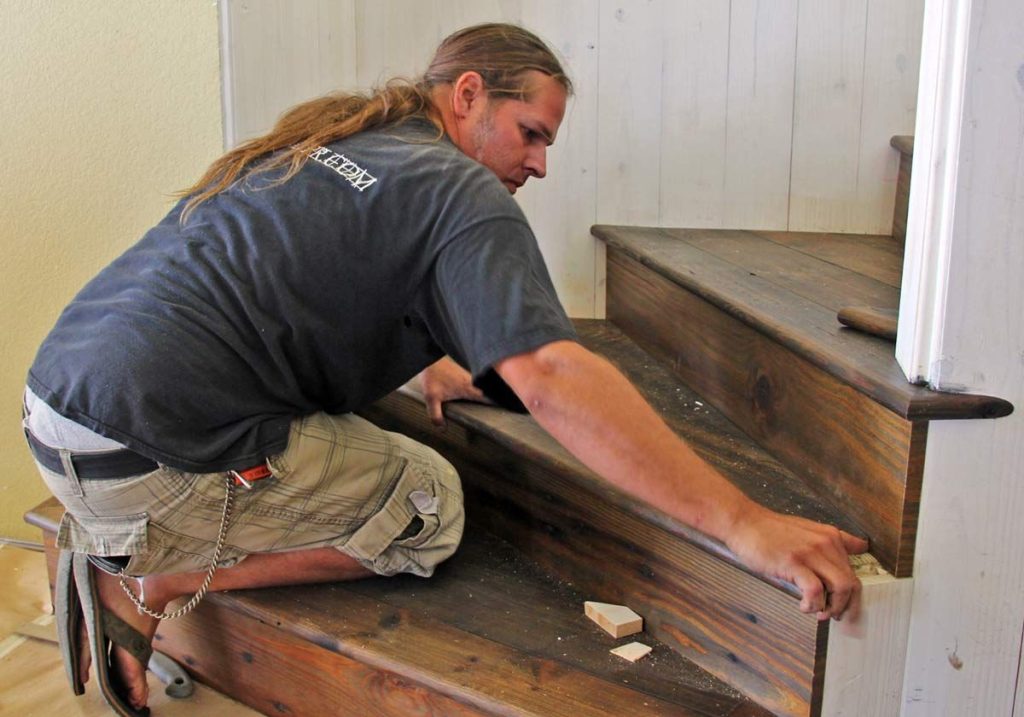
Gerry installs the winder treads on the stair case. He made patterns for each tread then cut the treads to fit the patterns.
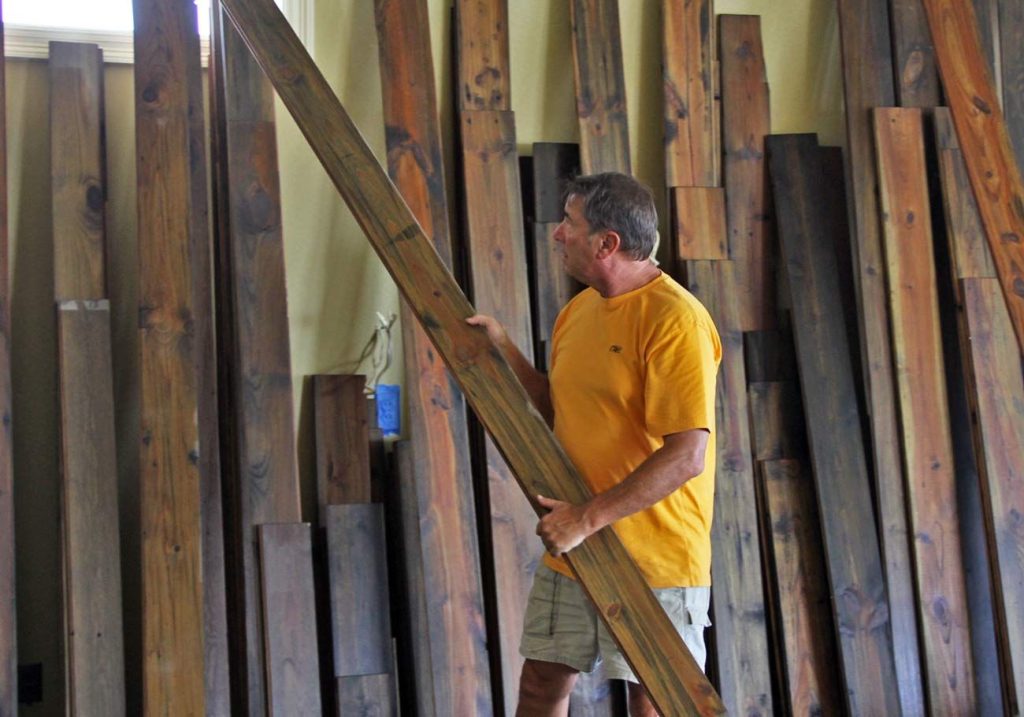
Rob, the owner, has stacked and sorted the floor boards by width, length, and appearance grade. These reclaimed heart pine floor boards came from an Old Crow distillery and contain a beautiful assortment of color, grain, and character that you just can’t find in new growth flooring products. These floor boards will wear extremely well. Modern wood floors typically have high uniformity, are vulnerable to scratches, nicks, and dents, and you have to protect them very carefully during construction. These reclaimed boards have a dense grain and any nicks or dents just add to the distressed look. A great combination of natural beauty, durability, and wearability. Learn more at Authentic Pine Floors.
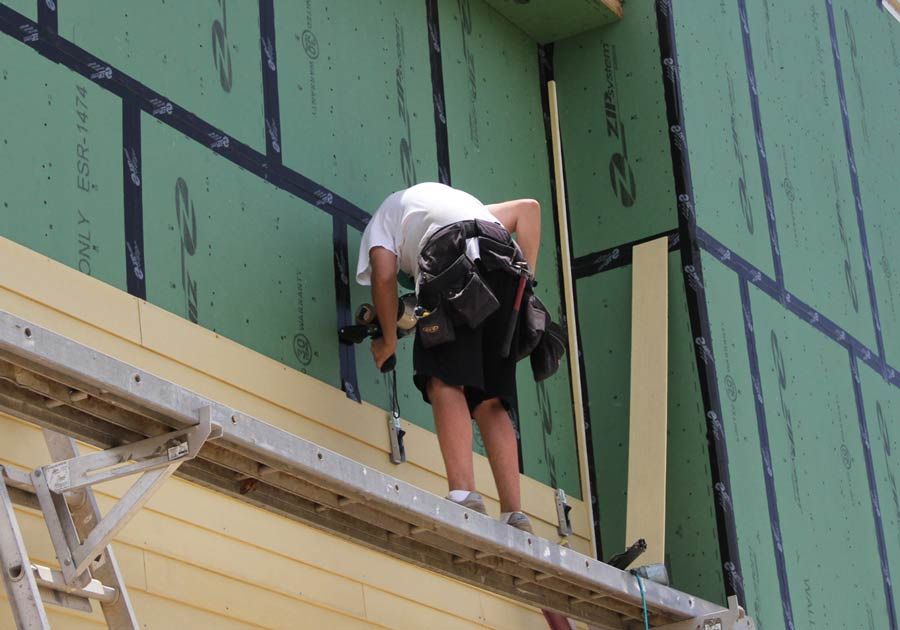
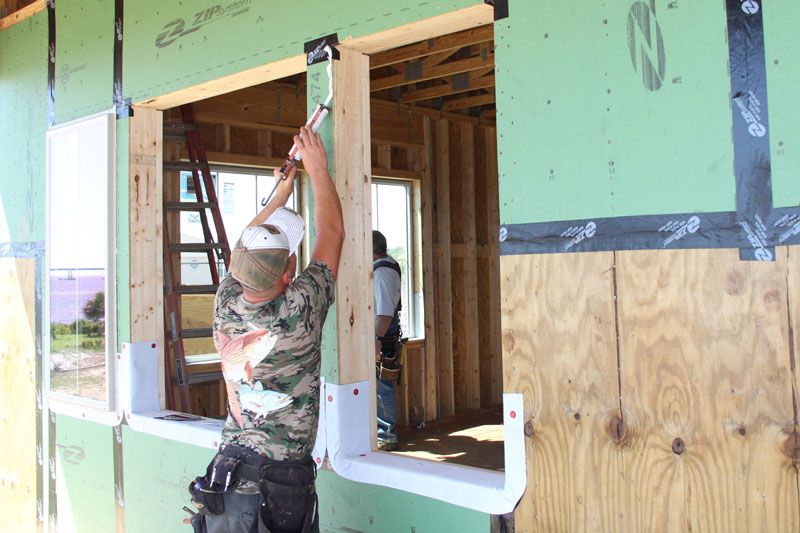
You can see how the but joints overlap the zip tape to create an air tight joint.
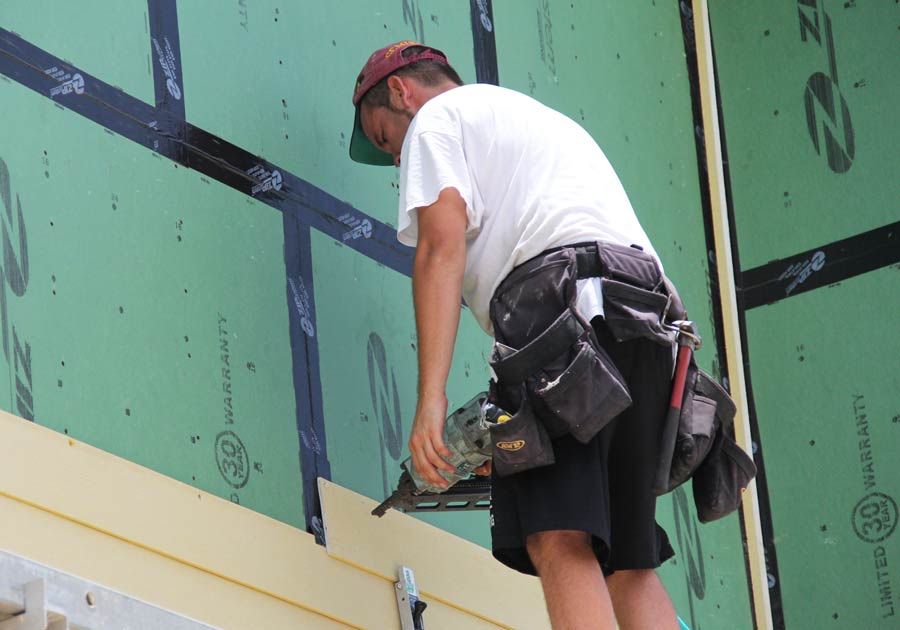
Zip tape is being applied where the next course of siding will have a butt joint. This will prevent rain water from getting behind the siding at the butt joint.
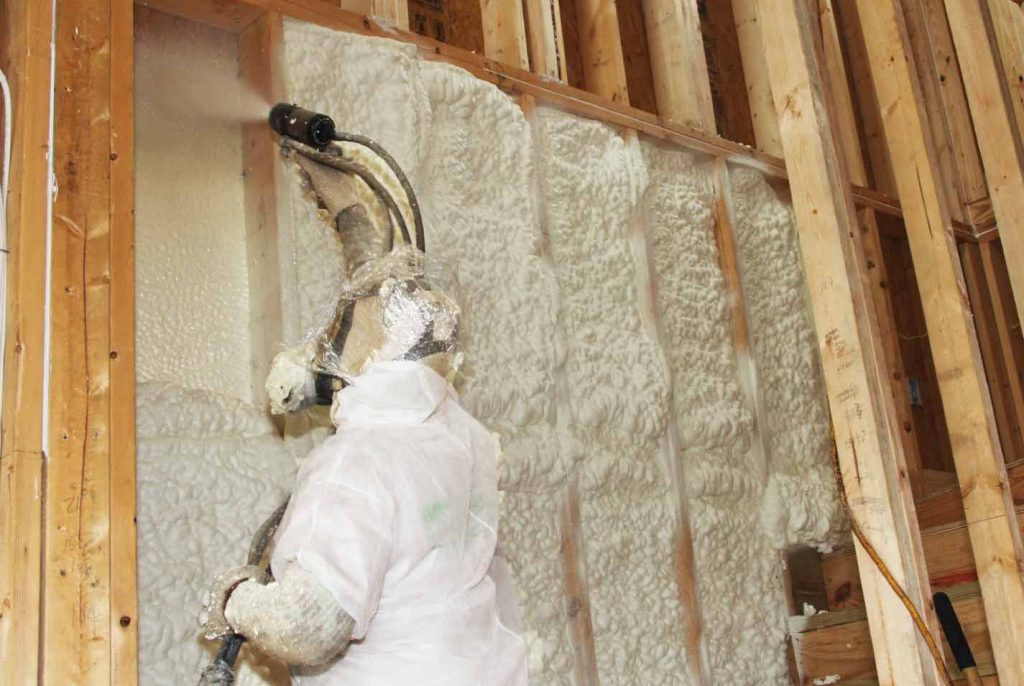
George sprays open cell foam in the stairwell wall cavities. You can see how much the foam expands when the chemical reaction takes place.
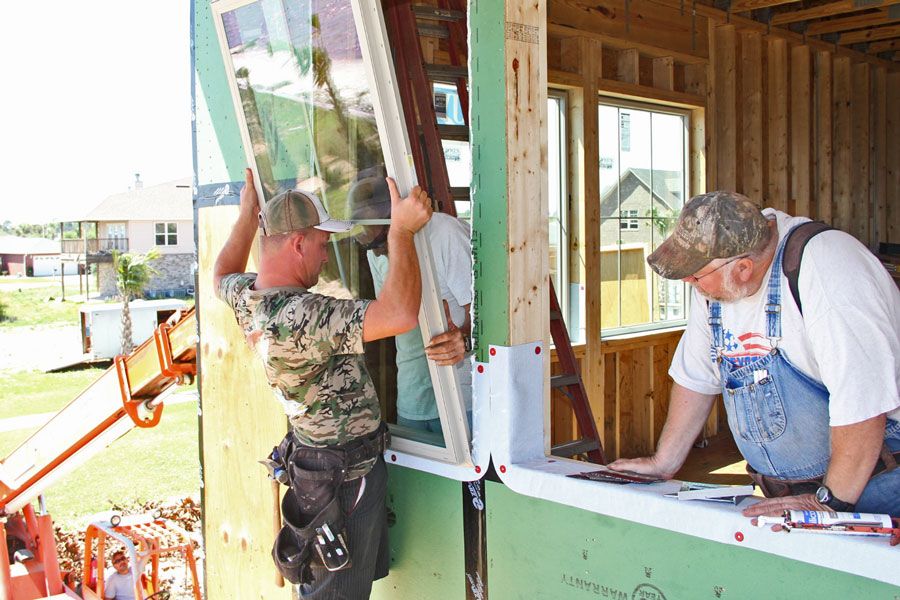
Roger and Steve set a window. A white, flexible, self adhesive sill pan is installed on the framing at the bottom of the window opening before the window is installed. This protects the framing and directs water outside the wall should there be any moisture intrusion.
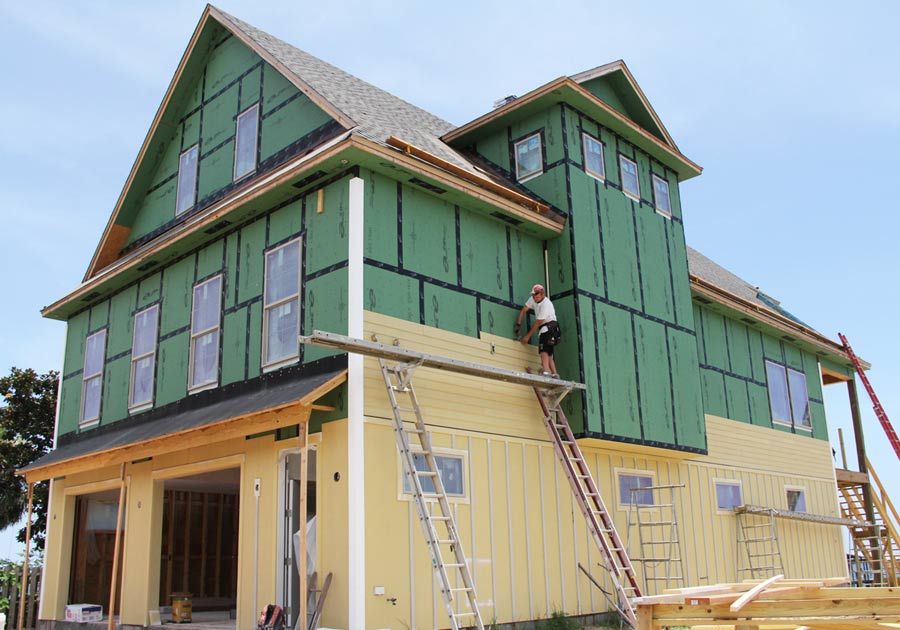
Roger applies adhesive caulk for the windows. The windows are sealed to the sheathing on the top and both sides but not the bottom so that any water intrusion can escape and drain out onto the outside of the wall. Sealing the bottom window flange is a common mistake made by most window installers. This is a big mistake because it can trap any water intrusion and cause it flow inside the wall and rot it out over time. A very small leak can go undetected for years until the whole wall is rotted out below the window. All openings should be flashed so as to direct any water intrusion to the outside of the wall outside of the secondary moisture barrier. In this case the secondary moisture barrier is the green zip wall coating which works great because it seals around the nail holes and all the joints are taped. This is a much better wall system than using house wrap over unprotected sheathing.
Framing in the gable end.
A 50 mil peal and stick sub roofing is being applied to prevent water intrusion in case of shingle damage during a hurricane.
A 50 mil peal and seal subroof has been installed to protect against water damage in the event any shingles get blown off during a hurricane. The green coating on the zipwall sheathing protects the wood and greatly reduces the amount of air that will pass through it. All the joints have been sealed with high adhesive tape. This is key to building an airtight, energy efficient home.
Robbie, the proud papa.
Brandon climbs down, done for the day. It’s not huntin season so I guess he’s going truckin.
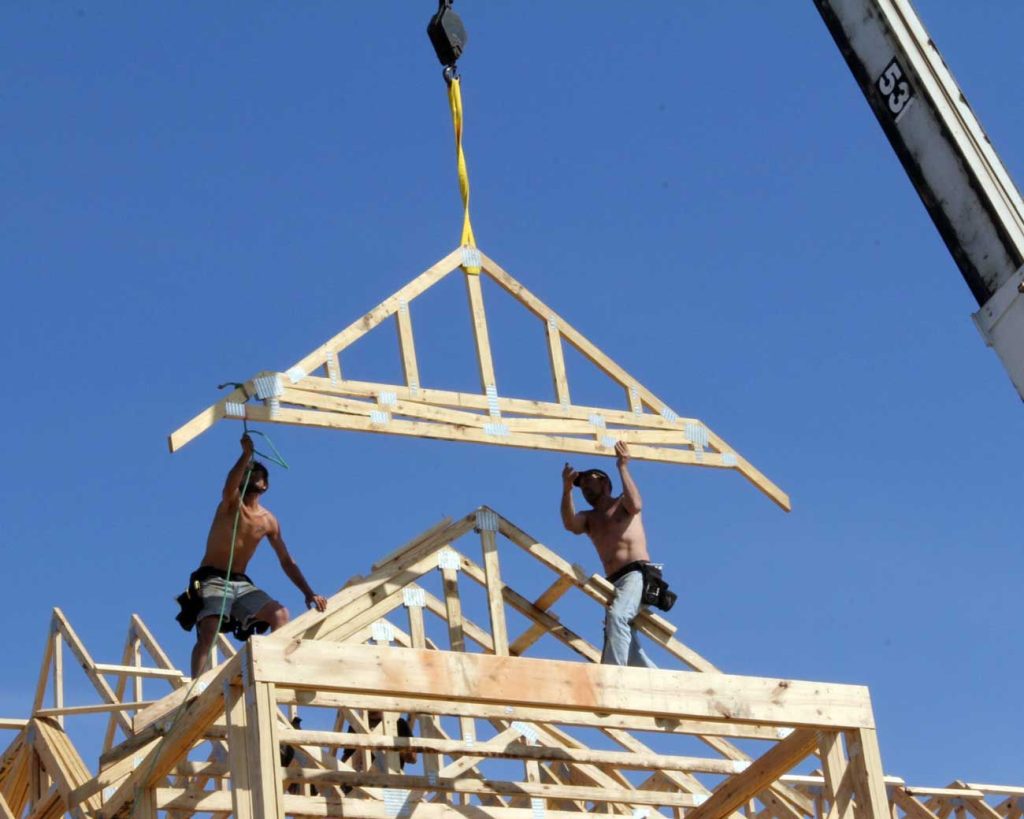
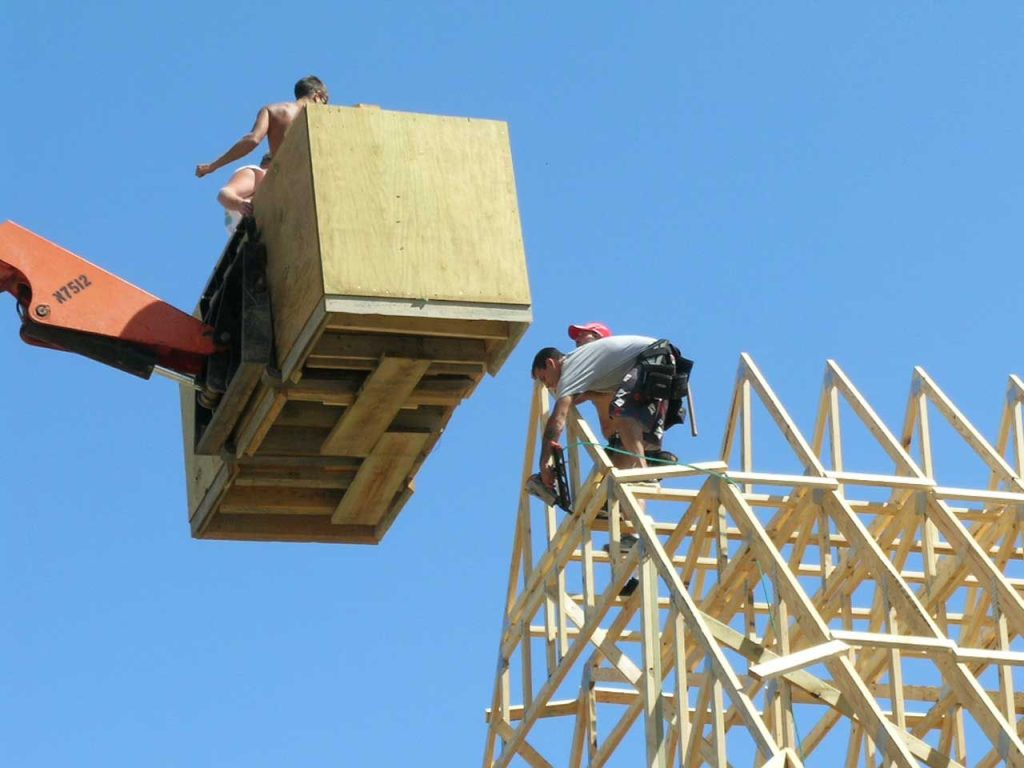
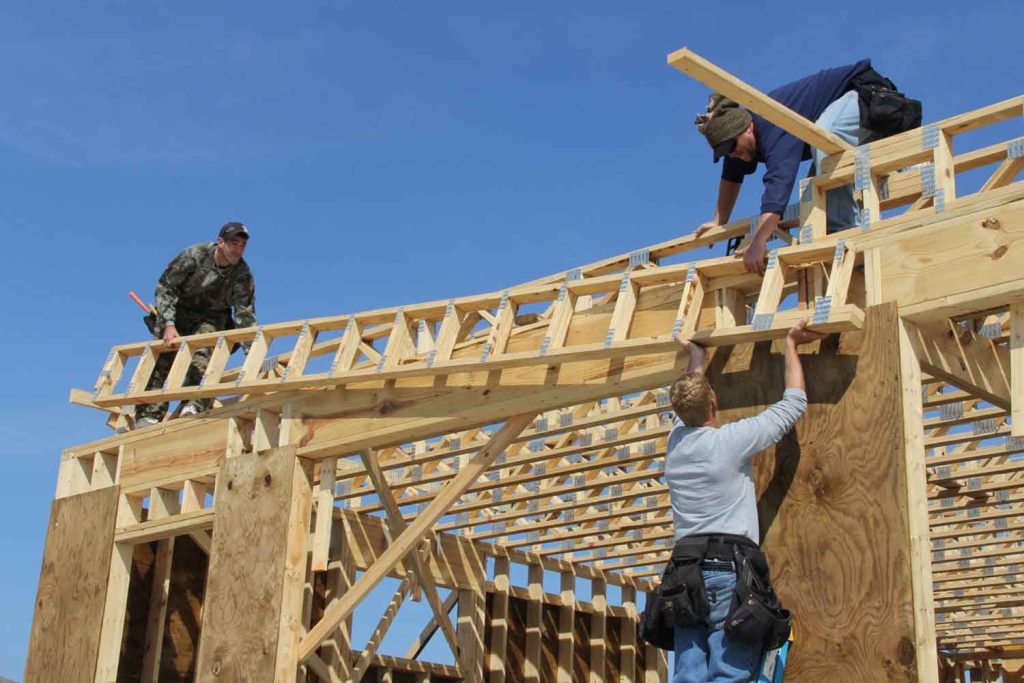
Jesse and Steve set the last truss over the stair tower.
Jesse, Kenny, and Steve set the front trusses. I was able to get a 9′ ceiling inside the shape of the trusses for the third floor master suite.
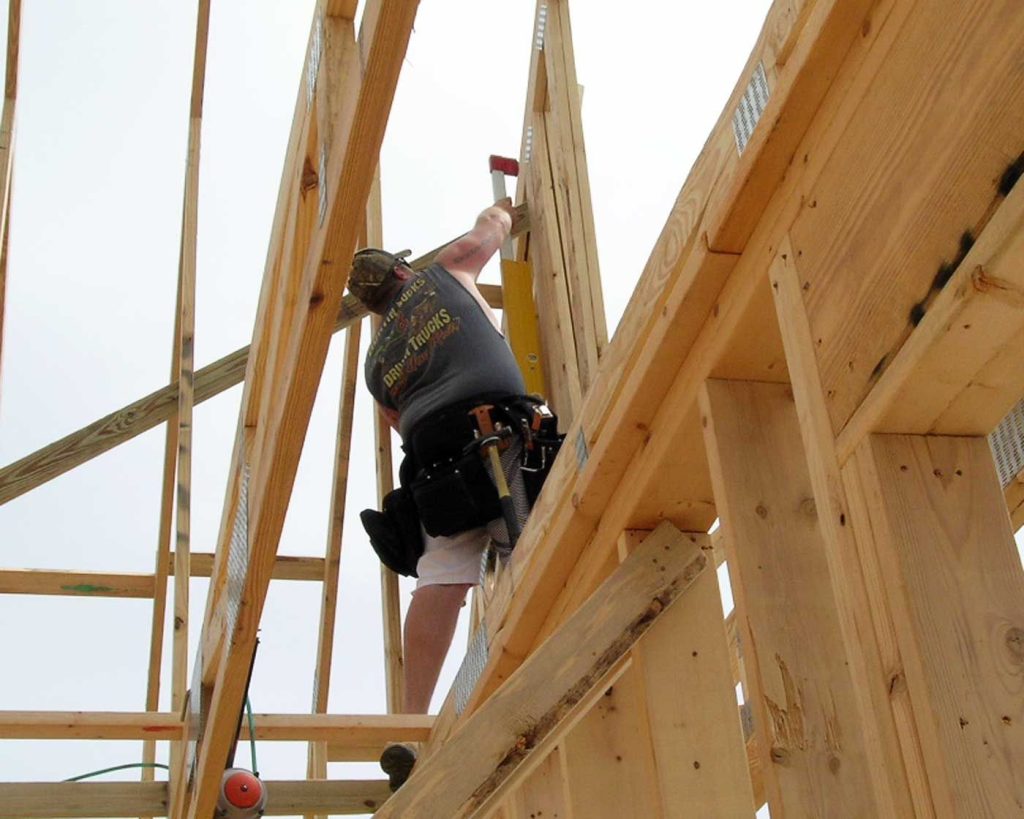
Brandon checks the gable end truss for plumb.
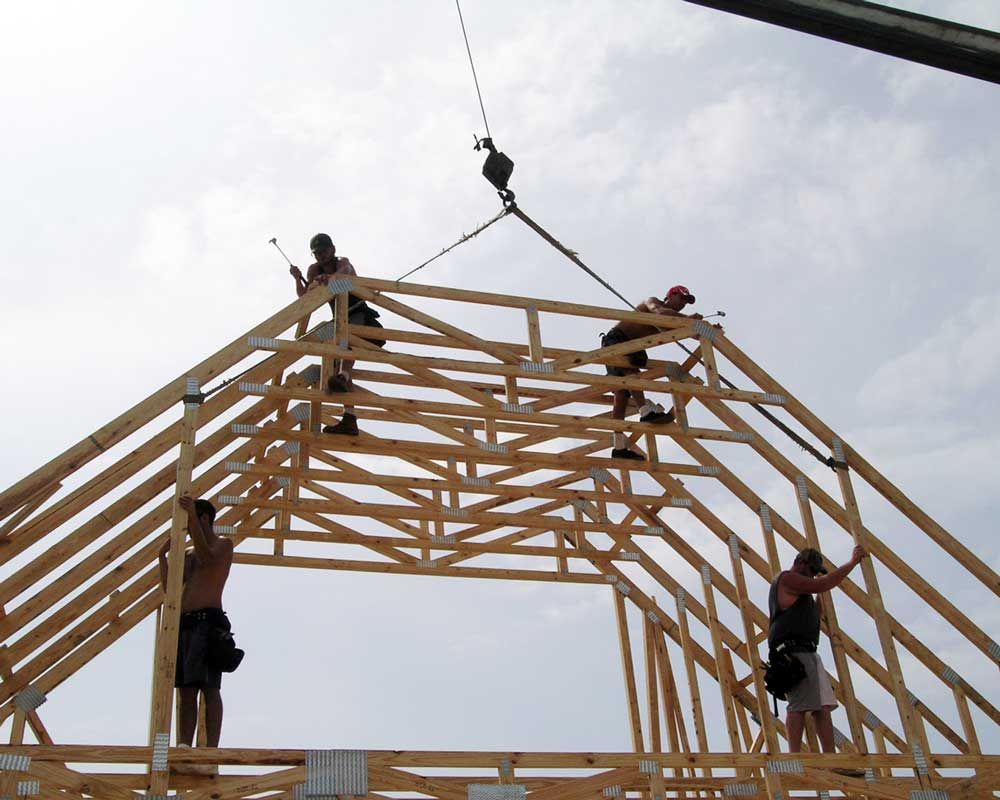
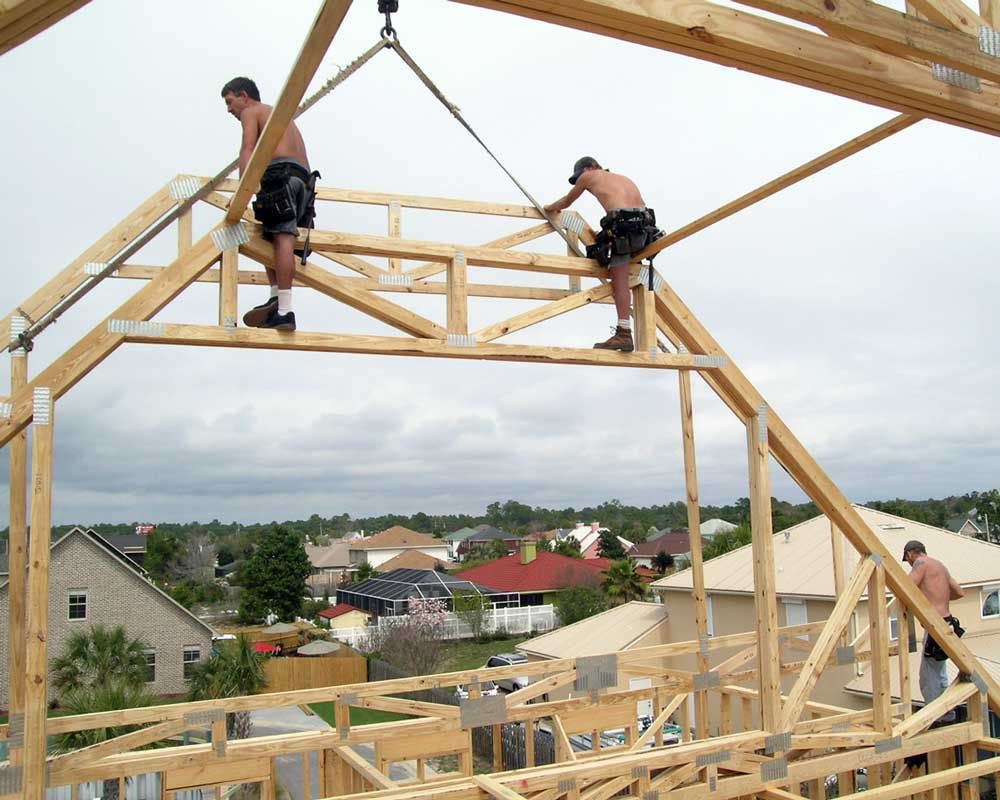
Josh, Jesse, Kenny, and Danny set the 3rd floor common trusses.
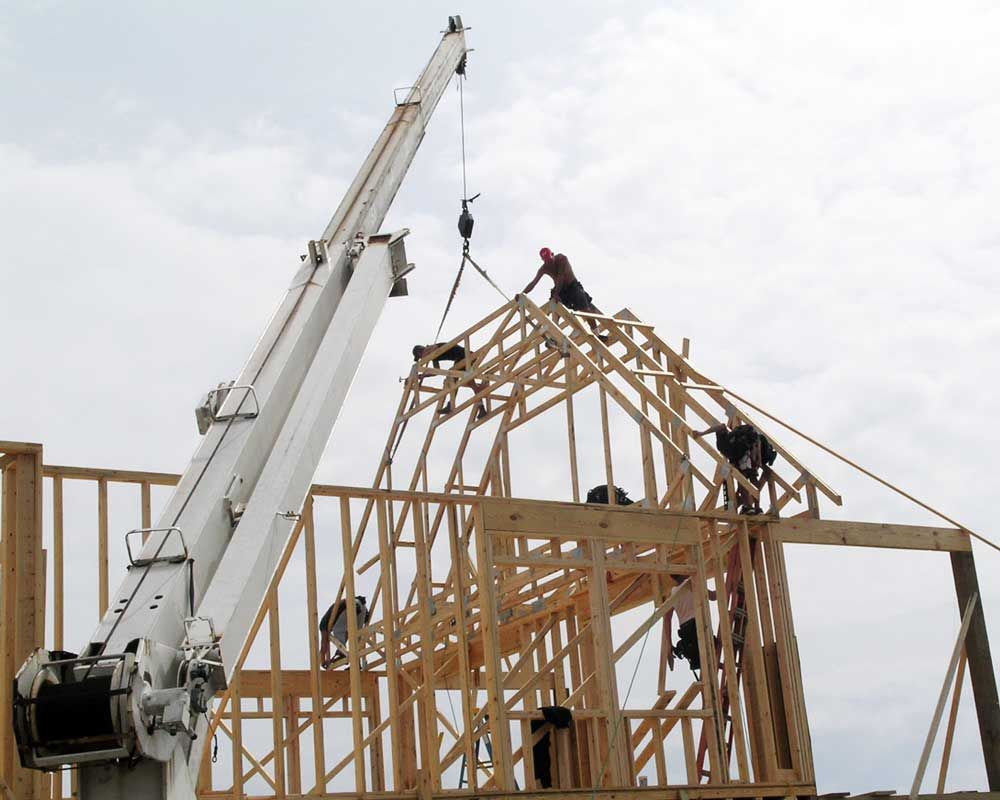
Brandon, Jesse, Kenny, and Danny set the 3rd floor common trusses.
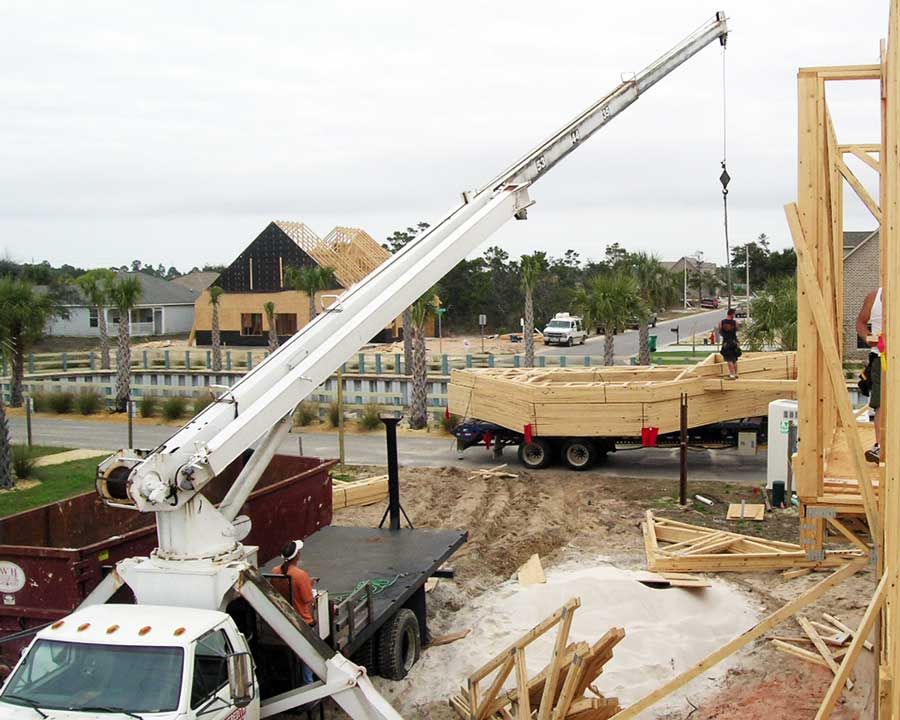
Ward operates the crane while Roger rigs the trusses for pick up
Danny plumbs a back porch post

Danny and Steve set a back porch post
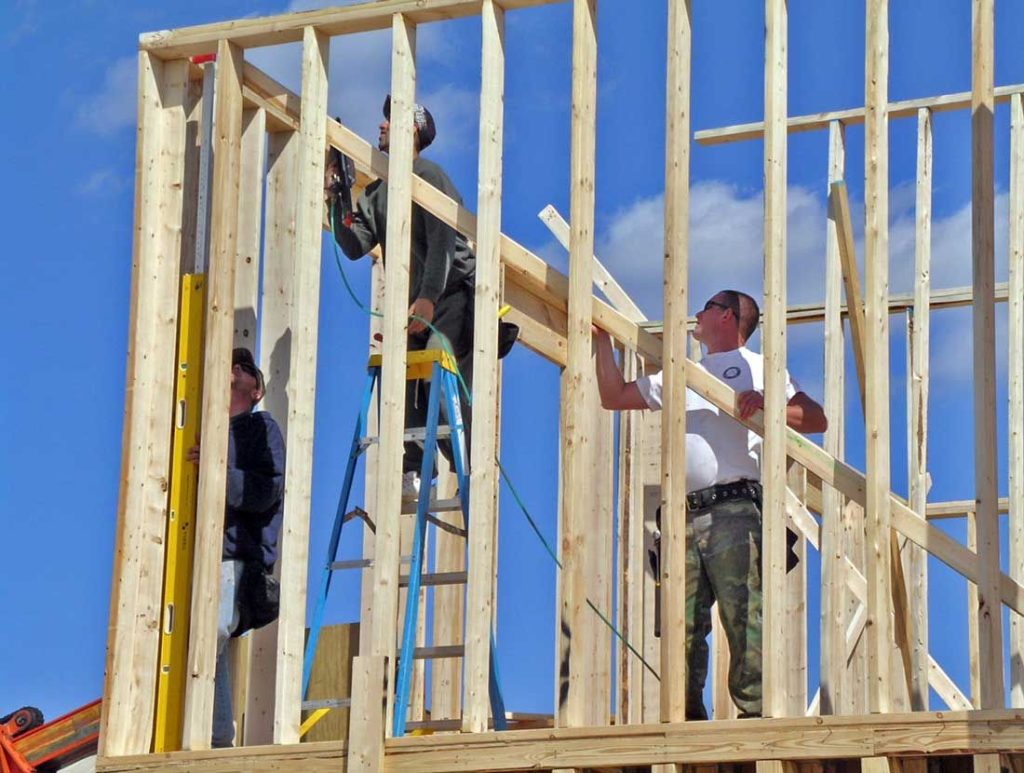
Brandon, Josh, and Roger adjust and brace the walls, plumb, level, and square.
Josh, Brandon, and Red lift a floor truss up onto the garage walls.

The glue tubes were a little chilly that morning so they decided to gather round the camp fire and warm up before getting squeezed out onto the floor decking.
Tony sets the anchor bolts which are used to attach the walls to the foundation. The hold down straps protruding from the concrete provide extra holding power on either side of wall openings such as garage doors and at the building corners.
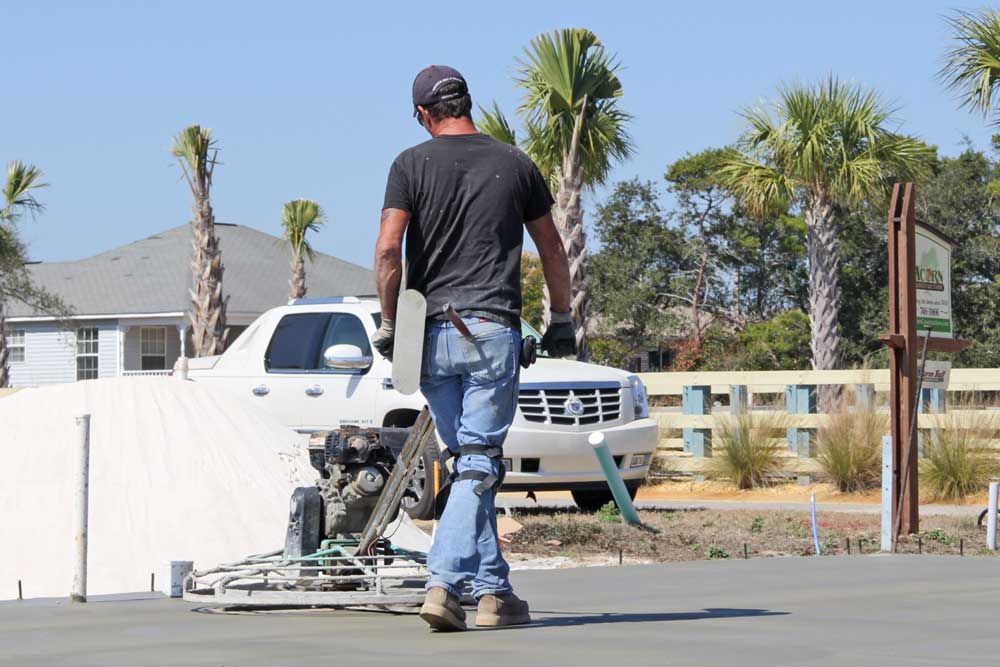
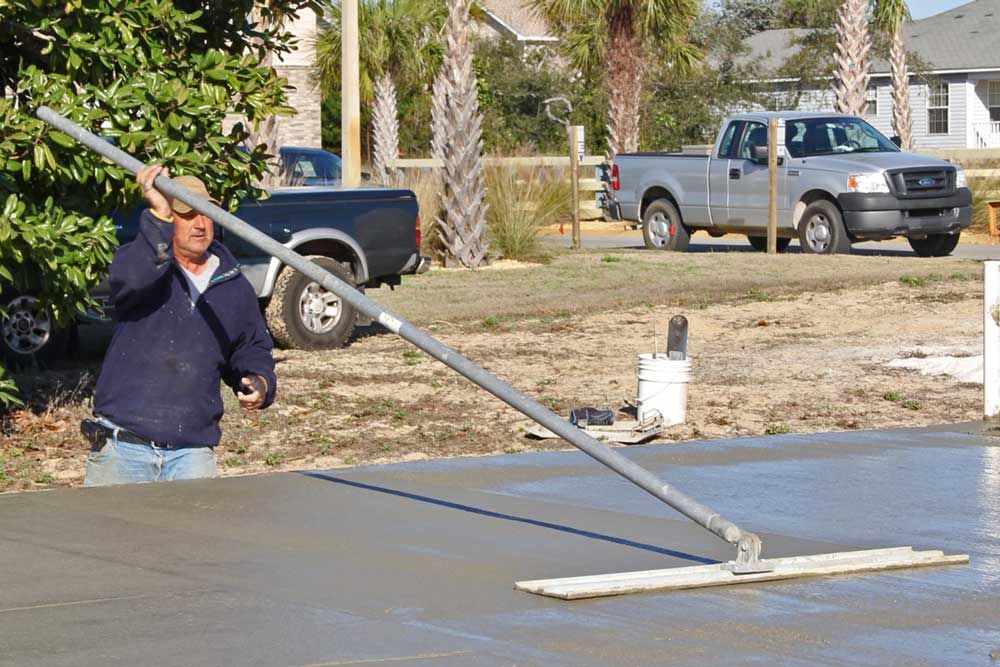
Roy on the rotary trowel putting the final touches on a smooth finish.
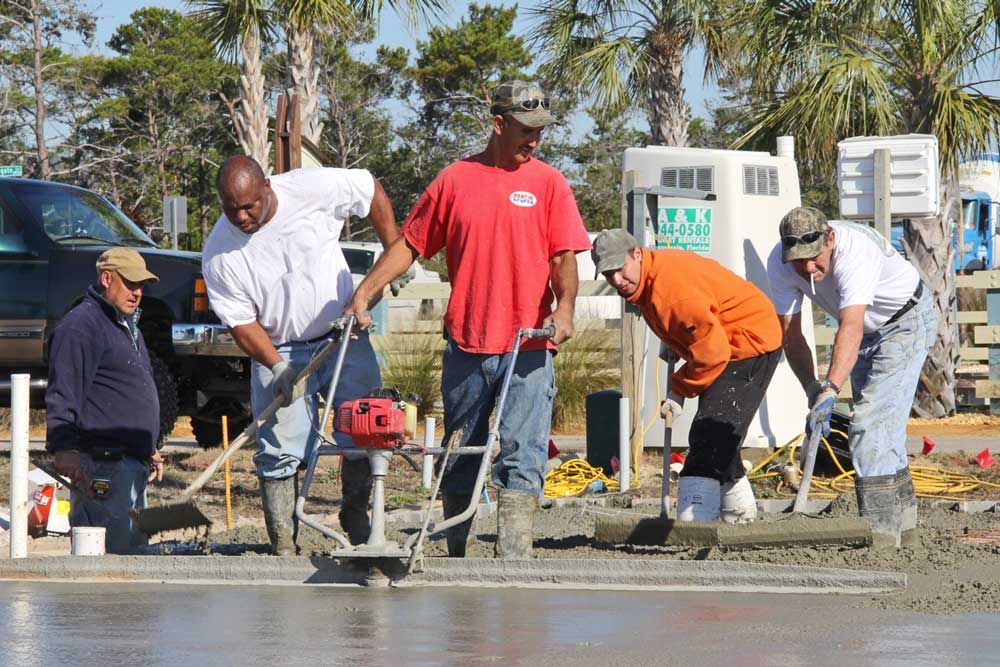
Junior operates the vibratory screed to smooth out the concrete to a level surface. George, Bill, and Tony spread the concrete behind him as Junior screeds backward.
Gomez bull floats the concrete to push the aggregate down below the surface.
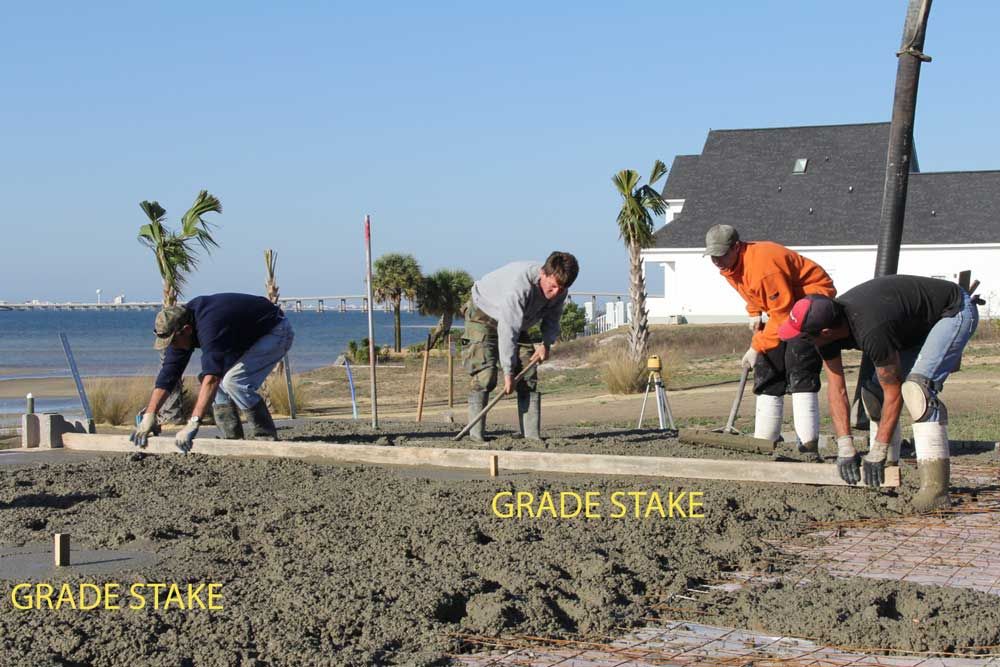
Tony and Roy hand screed tracks in the mud to guide the vibratory screed. The grade stakes have nails in them marking level reference points for them to work to. You can see the yellow laser head in the back ground which was used to set the grade stakes level.
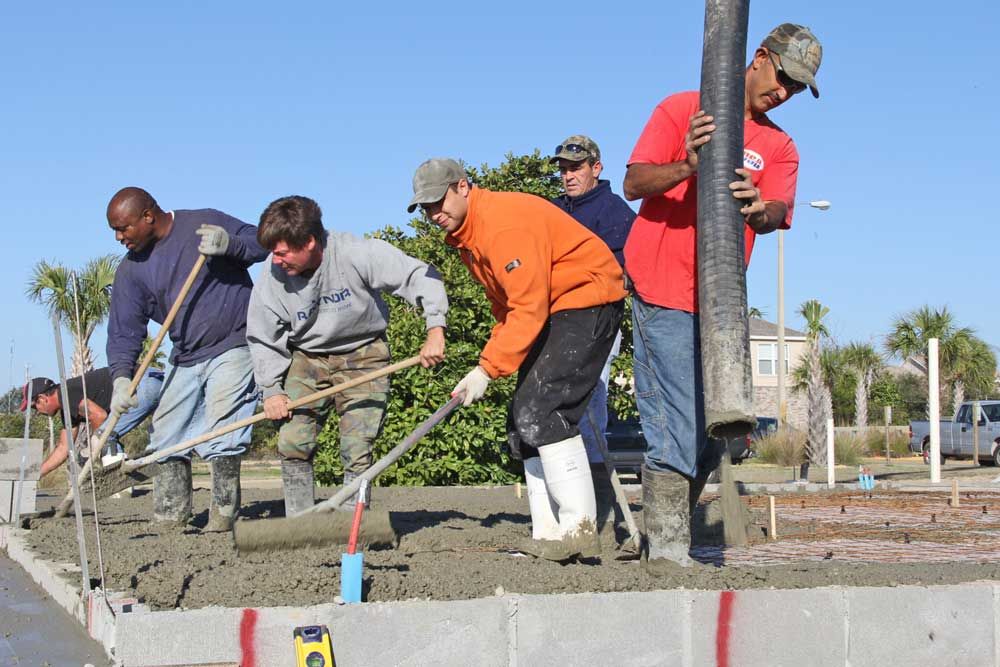
George, Ronnie, and Bill use come alongs to spread the concrete while Junior maneuvers the hose to place the concrete. The red paint marks the locations of where the anchor bolts will be placed once the concrete has begun to set.
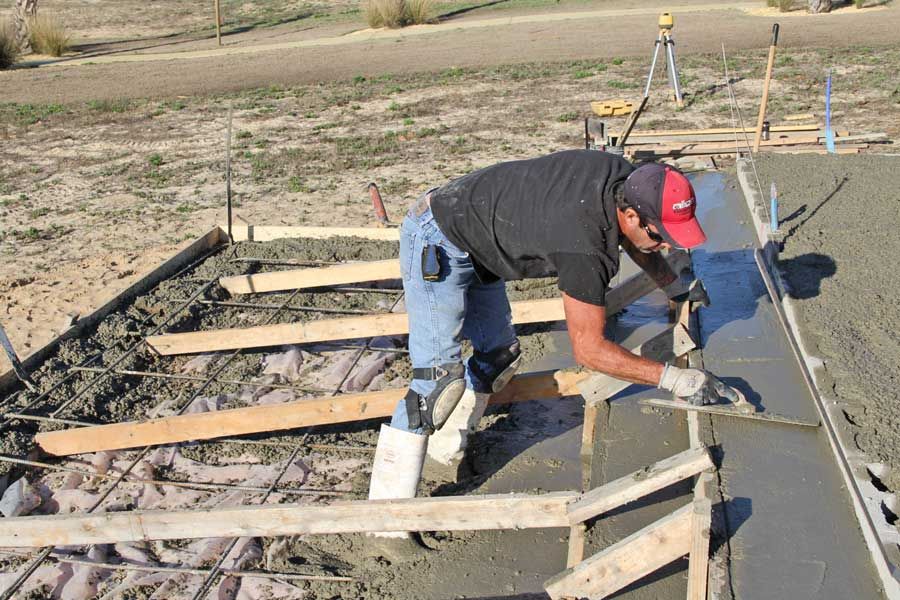
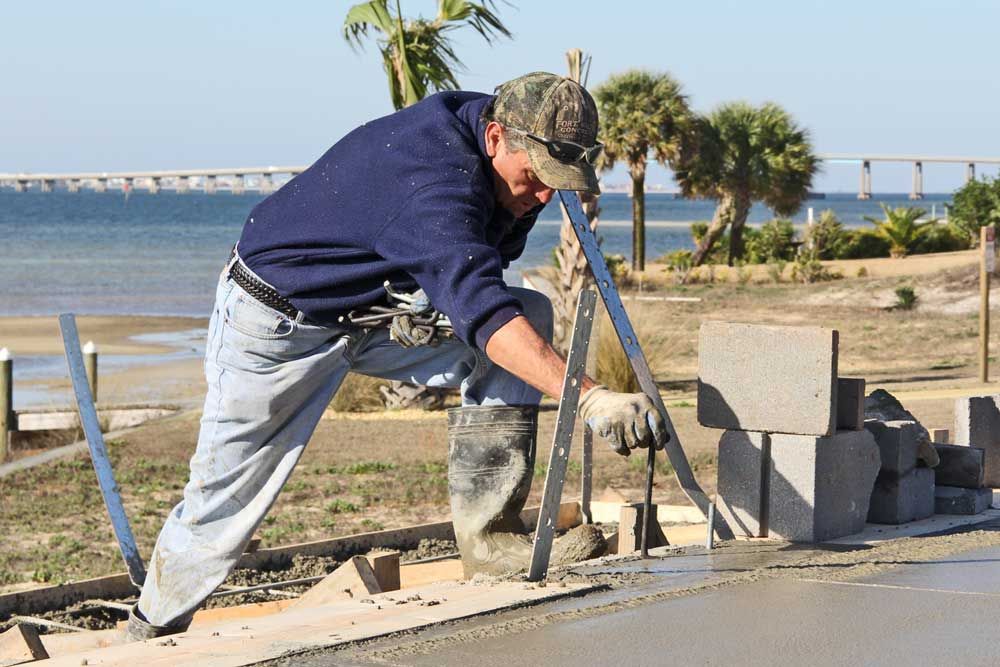
Roy finishes the back porch steps. Note the extra steel rebars in the back porch behind Roy which add strength to resist damage in the event of a storm surge.
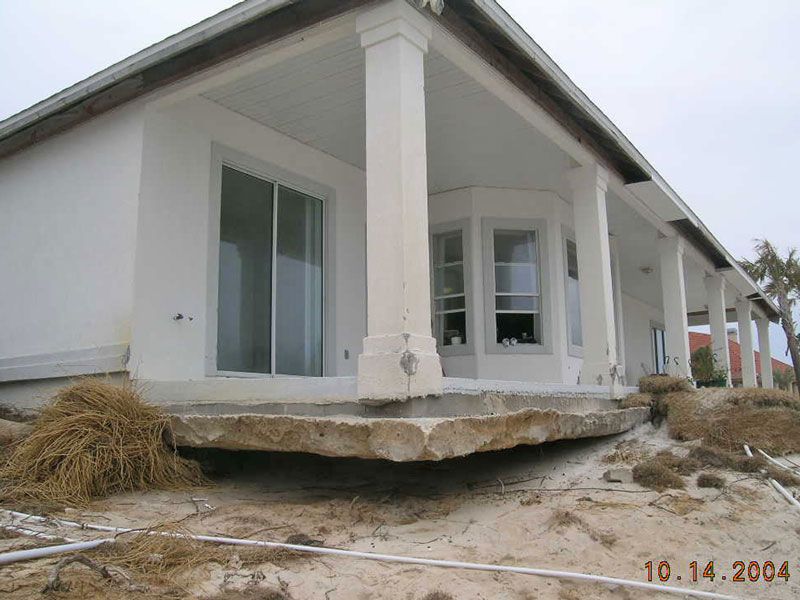
This is why we’re building a deep footing with extra steel reinforcement. This porch on the sound was severely undermined during hurricane Ivan. There was too much settlement and the home was later demolished.
We dug extra deep footings to prevent undermining of the foundation during a severe storm surge.
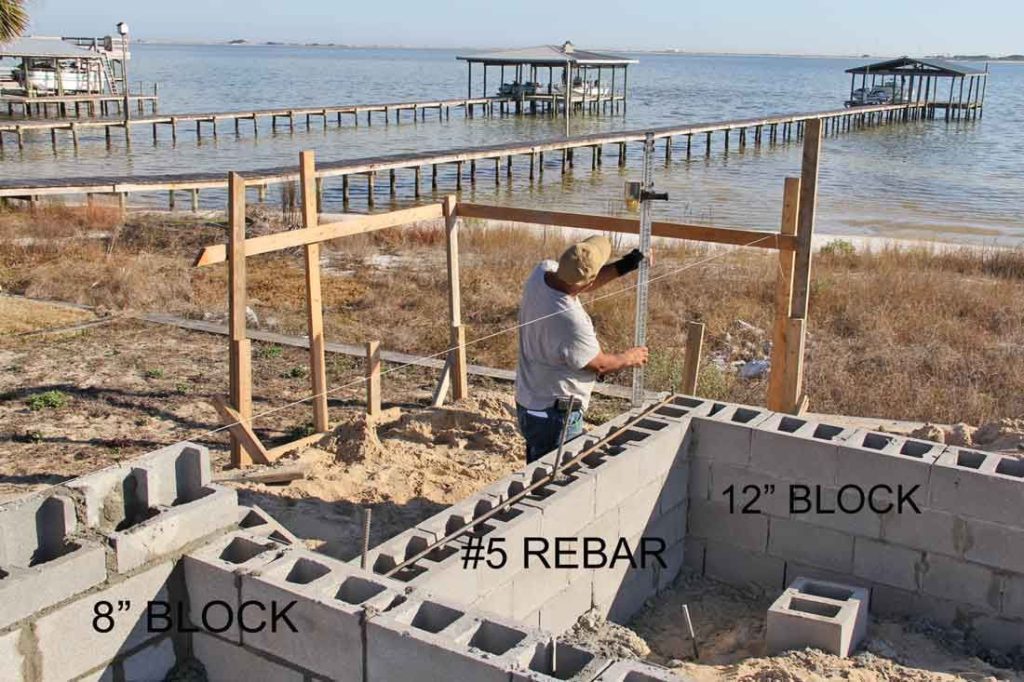
Gomez checks the elevation at the porch with a laser level. We’re using 12″ block around the porch and a #5 bar around the top to create a secondary sea wall in case the primary sea wall fails.
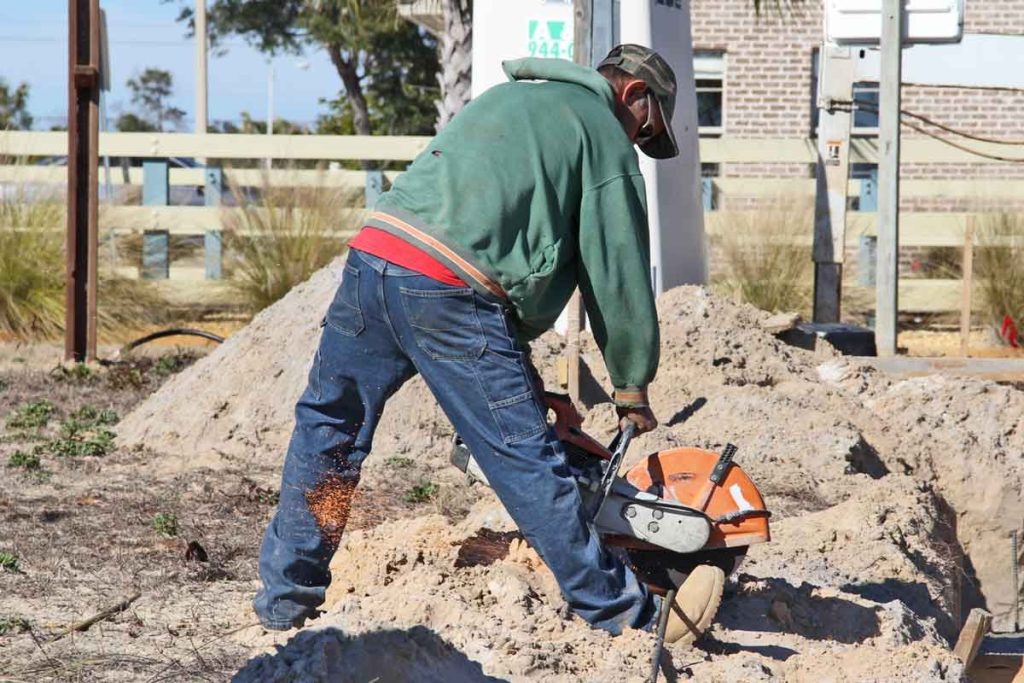
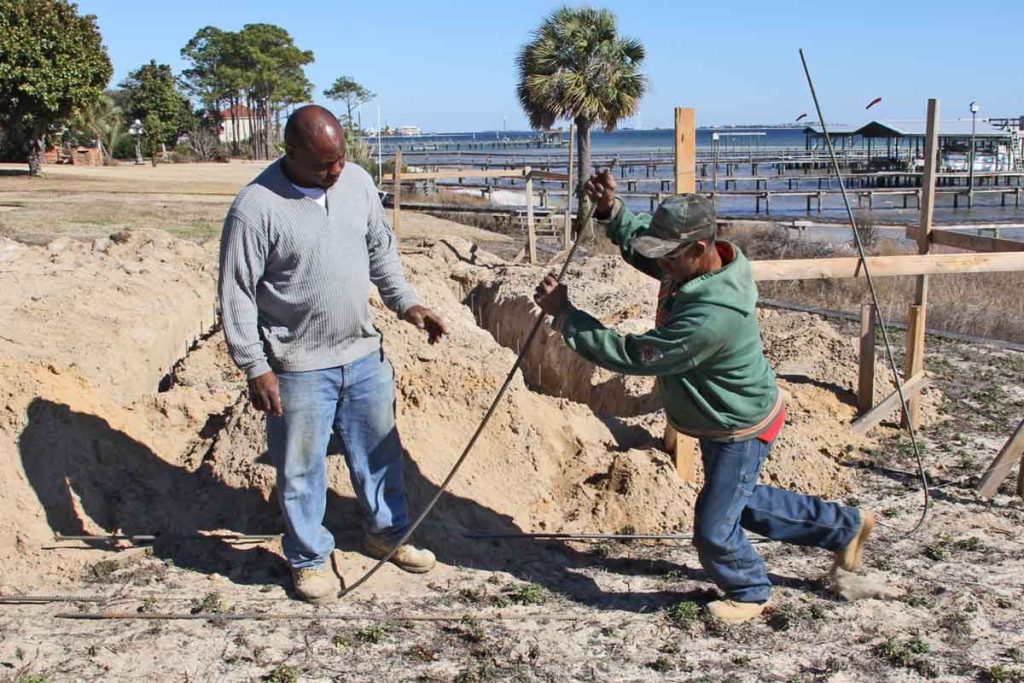
Junior cuts a rebar.
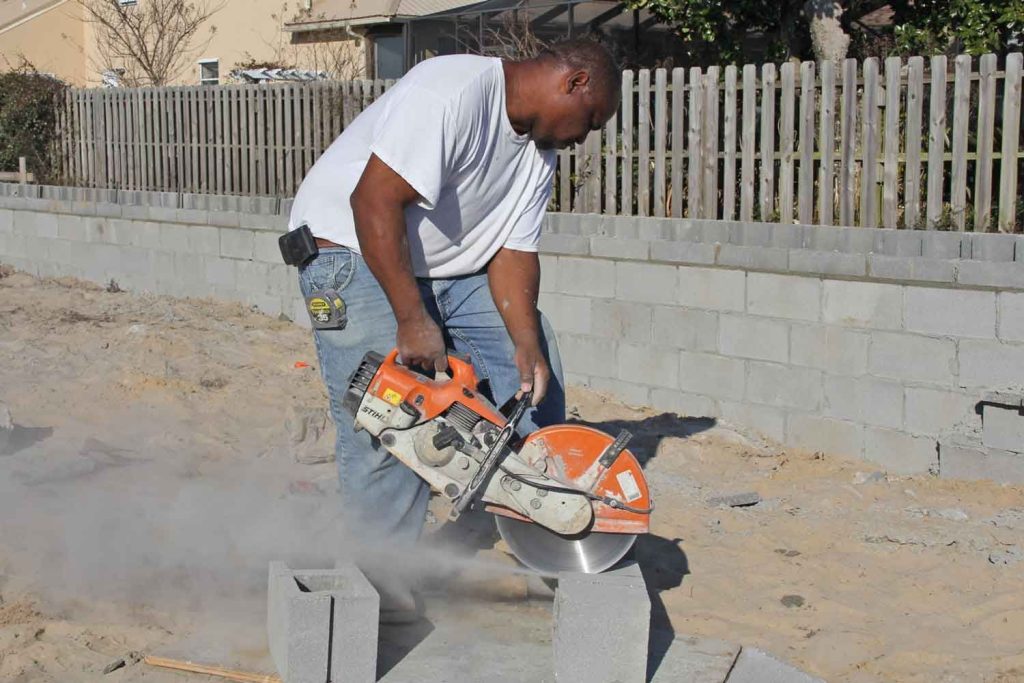
George cuts a CMU block.

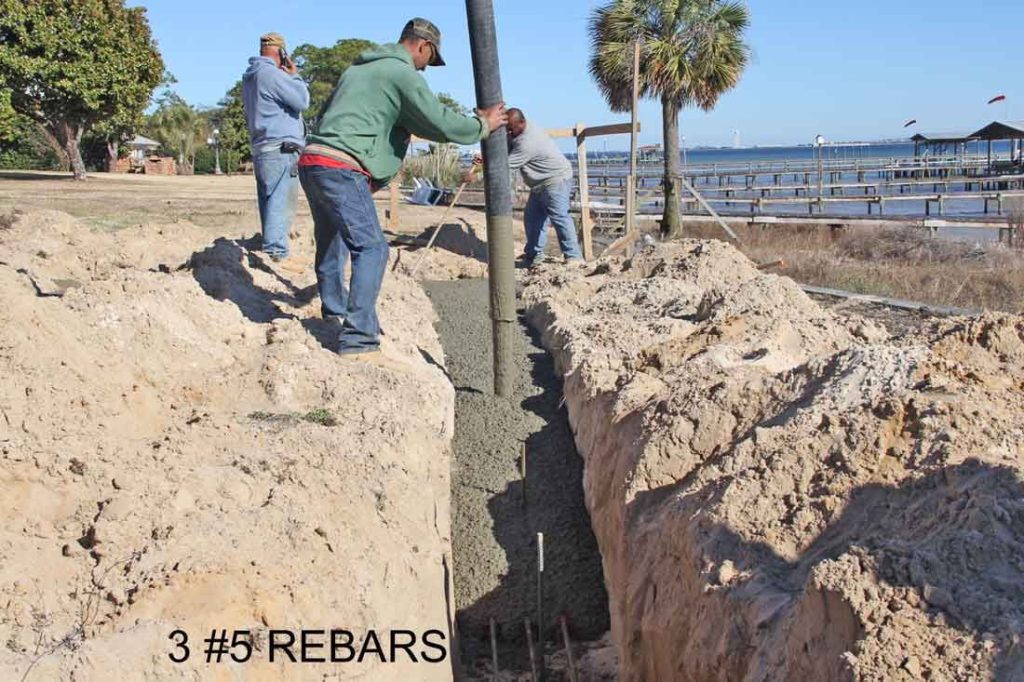
Junior and George use every bit of the 100′ boom to pump concrete into the porch footings near the sea wall.
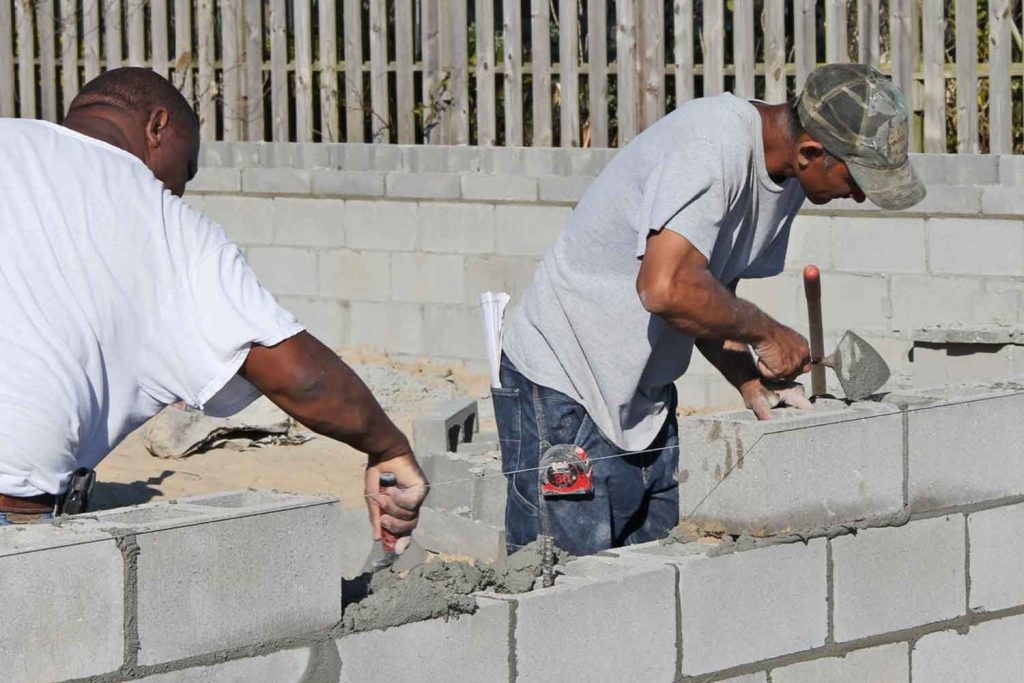
George and Junior lay up the block.
George and Gomez lay up the block.
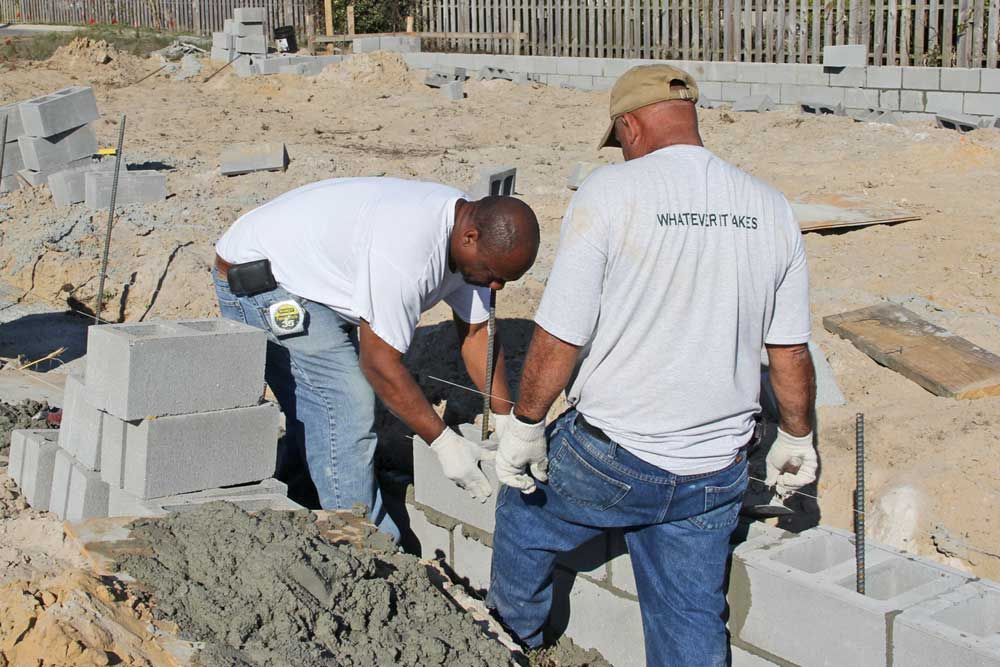
George and Junior bend the #5 rebars that will be placed in the top area of the footings.